Shopping & Other In-Stream Services
Branding
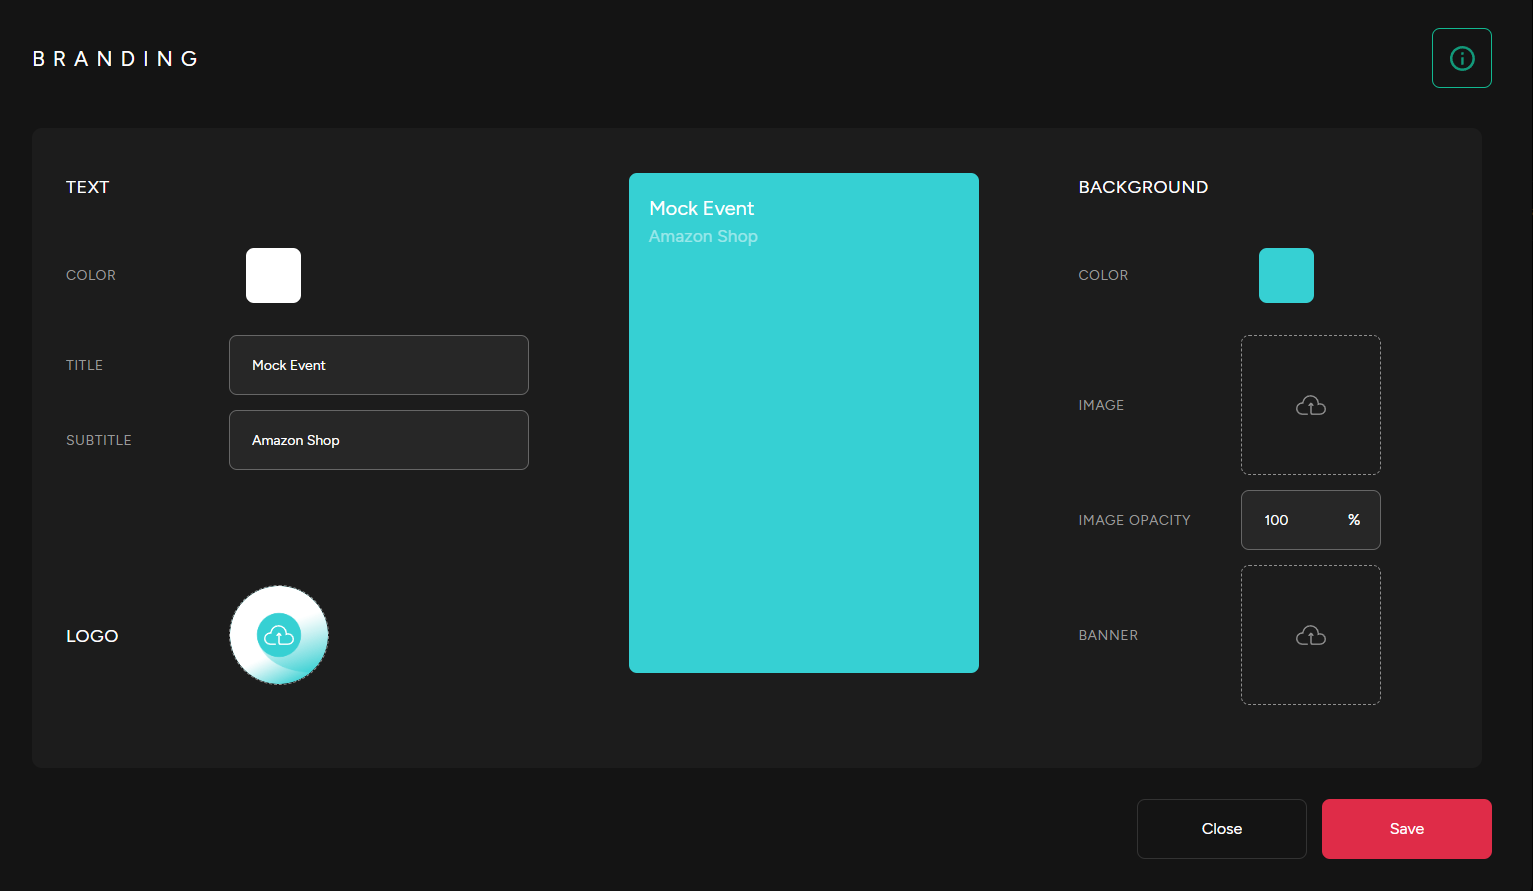
Customize Your Branding
- Customize the design in your branding section where all in-stream/micro-services can be accessed. You can see a preview at the center get an accurate sense of how it will look in your live event.
Shopping Chatbot
Create Shopping Chatbot
Connect to a Shopify, Magento & other stores or to a Merchant Product Feed.
Note: Creating a Shopping Chabot with an Ecommerce platform or with a Merchant Product Feed is identical. Only difference is in the product links you will need to provide. Follow steps below for more details...
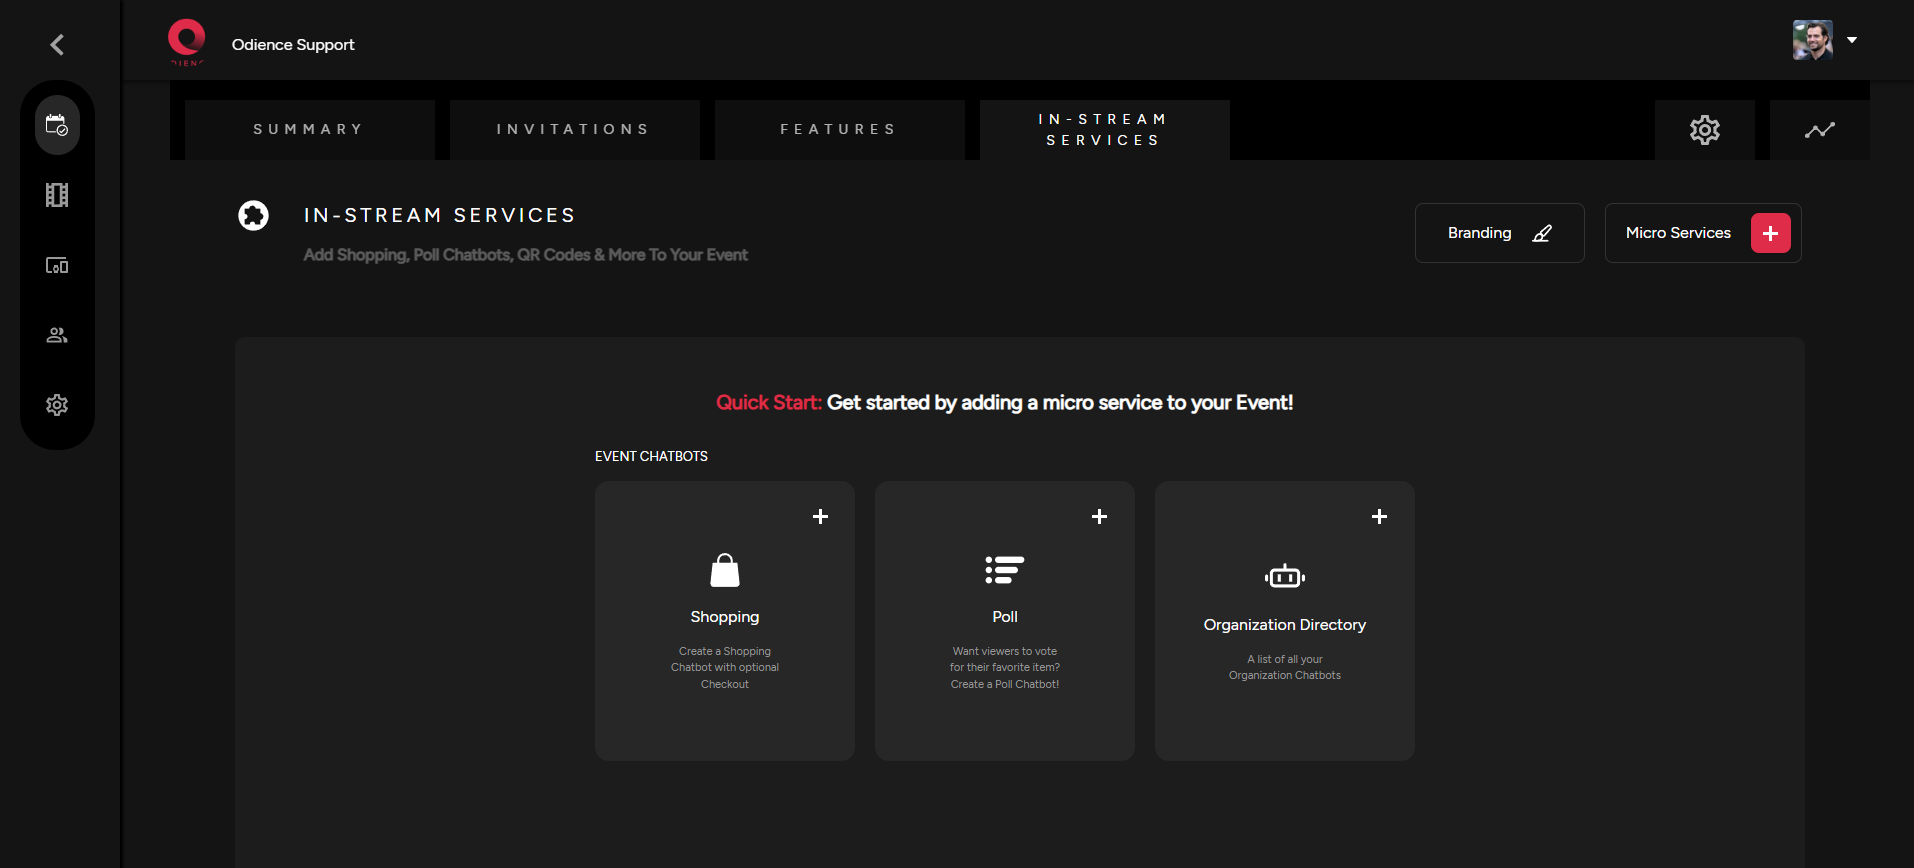
1. Select Shopping in your Quick Start or by selecting Add Chatbot in your Micro Services dropdown.

2. Select “Ecommerce platform”.
Note: Odience supports Ecommerce Platforms such as Shopify, Magento and others. Odience also support the use of Google, Amazon & other XML merchant feeds.
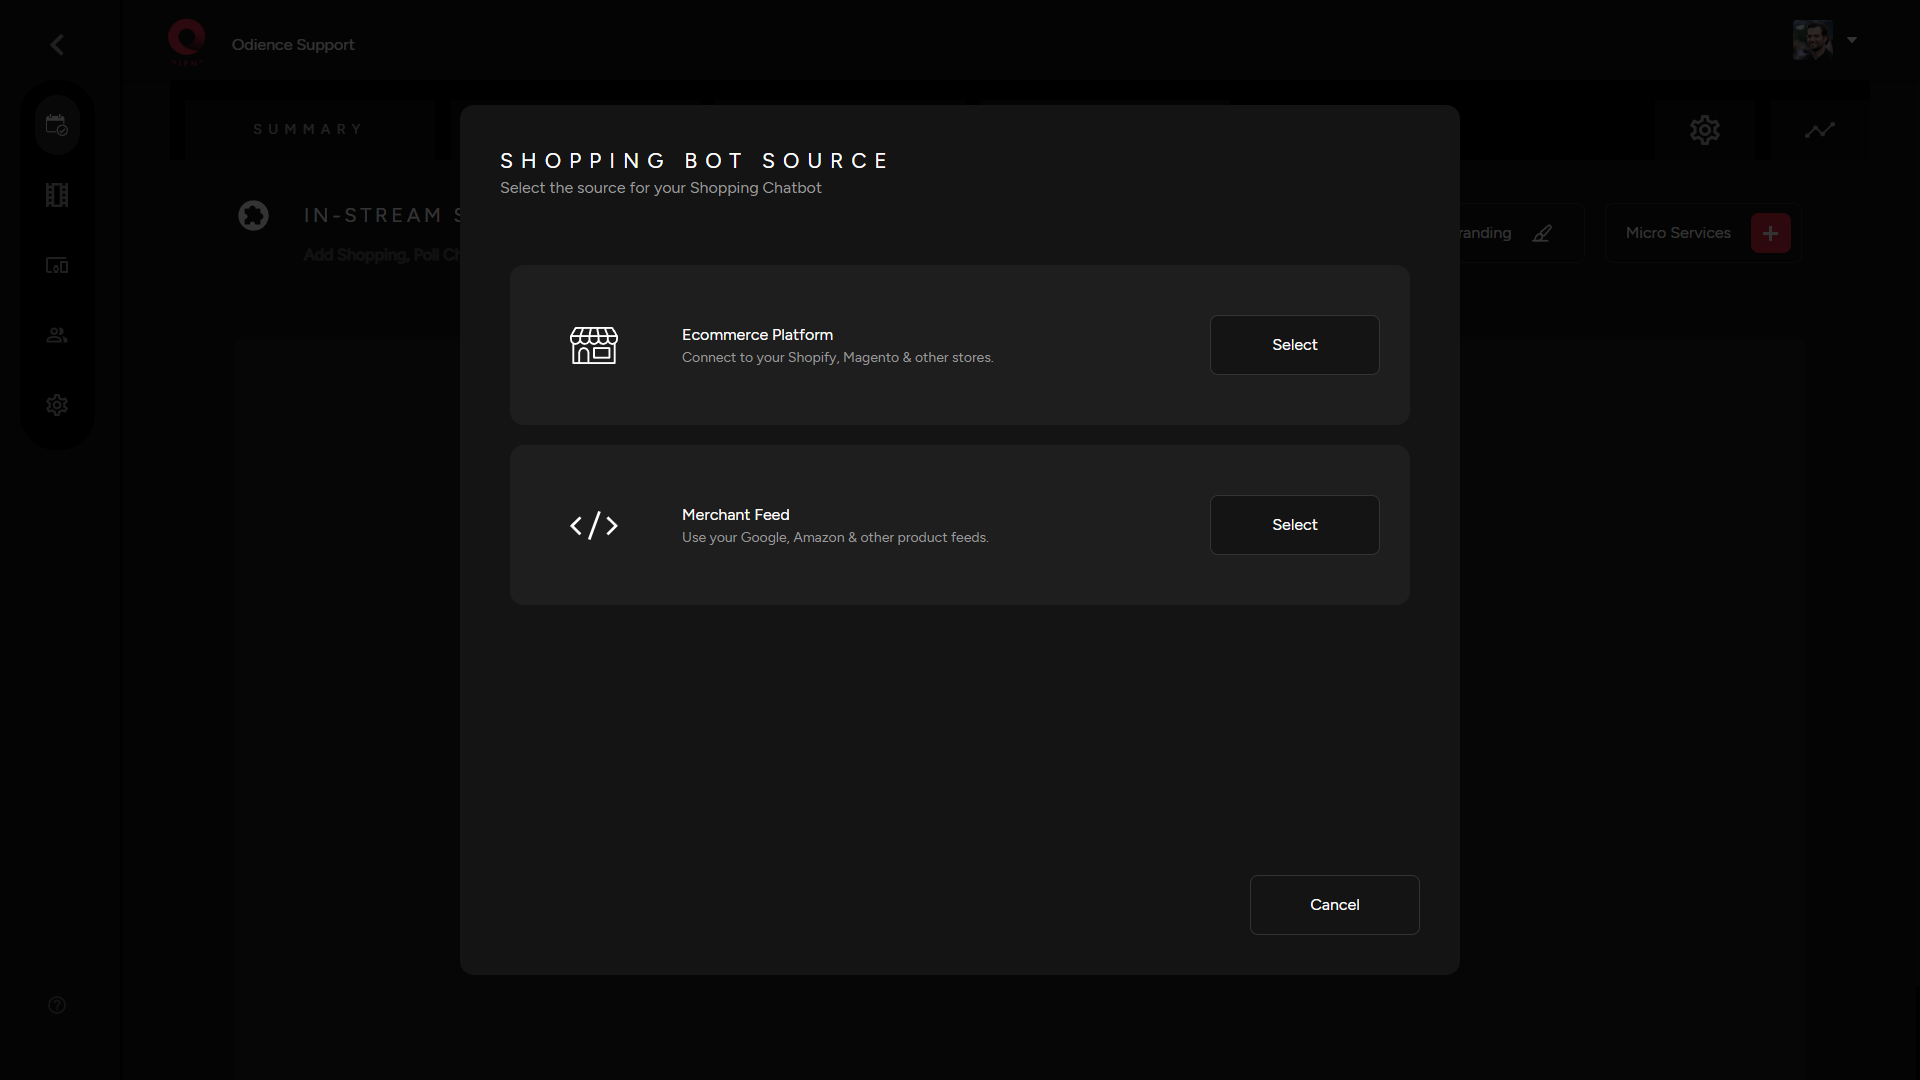
3. Select the platform you will be transferring your items from.
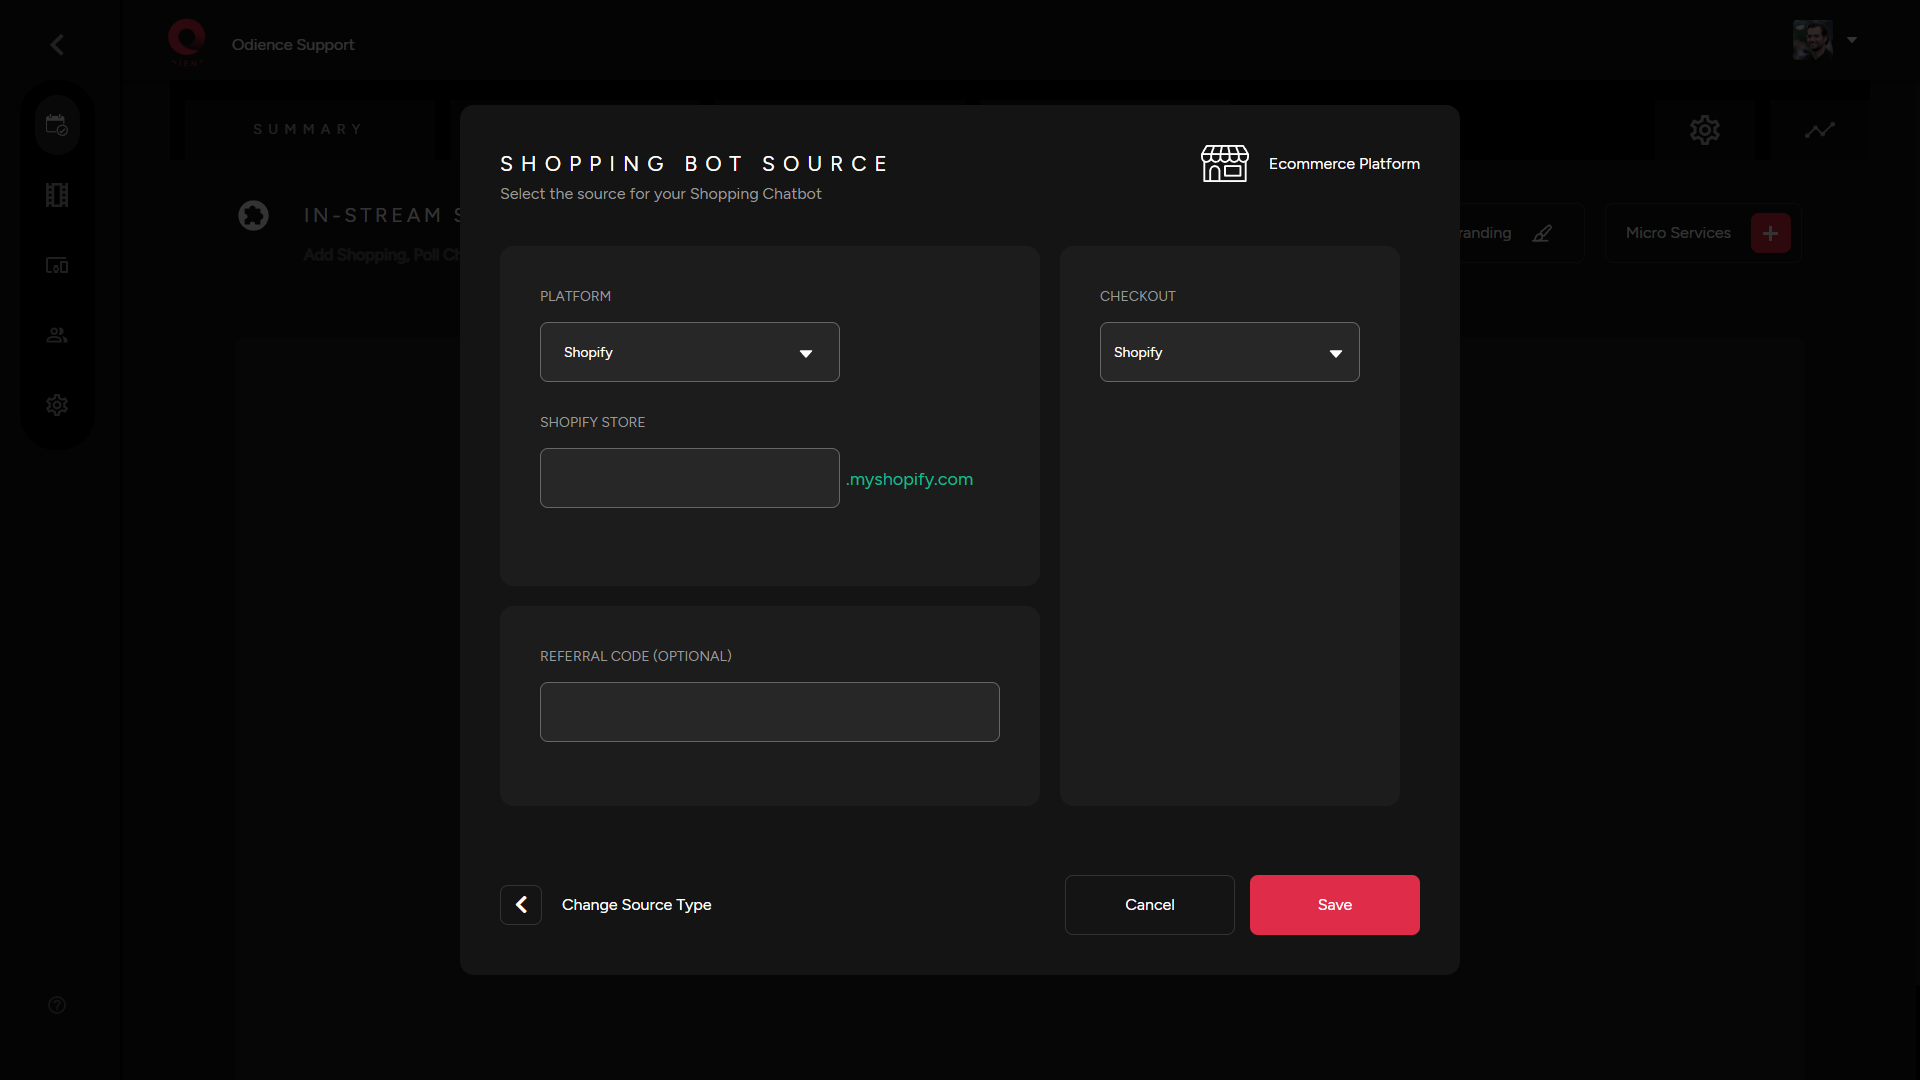
4. Link your Store to connect products to your chatbot. Referral Codes can also be created but is optional.
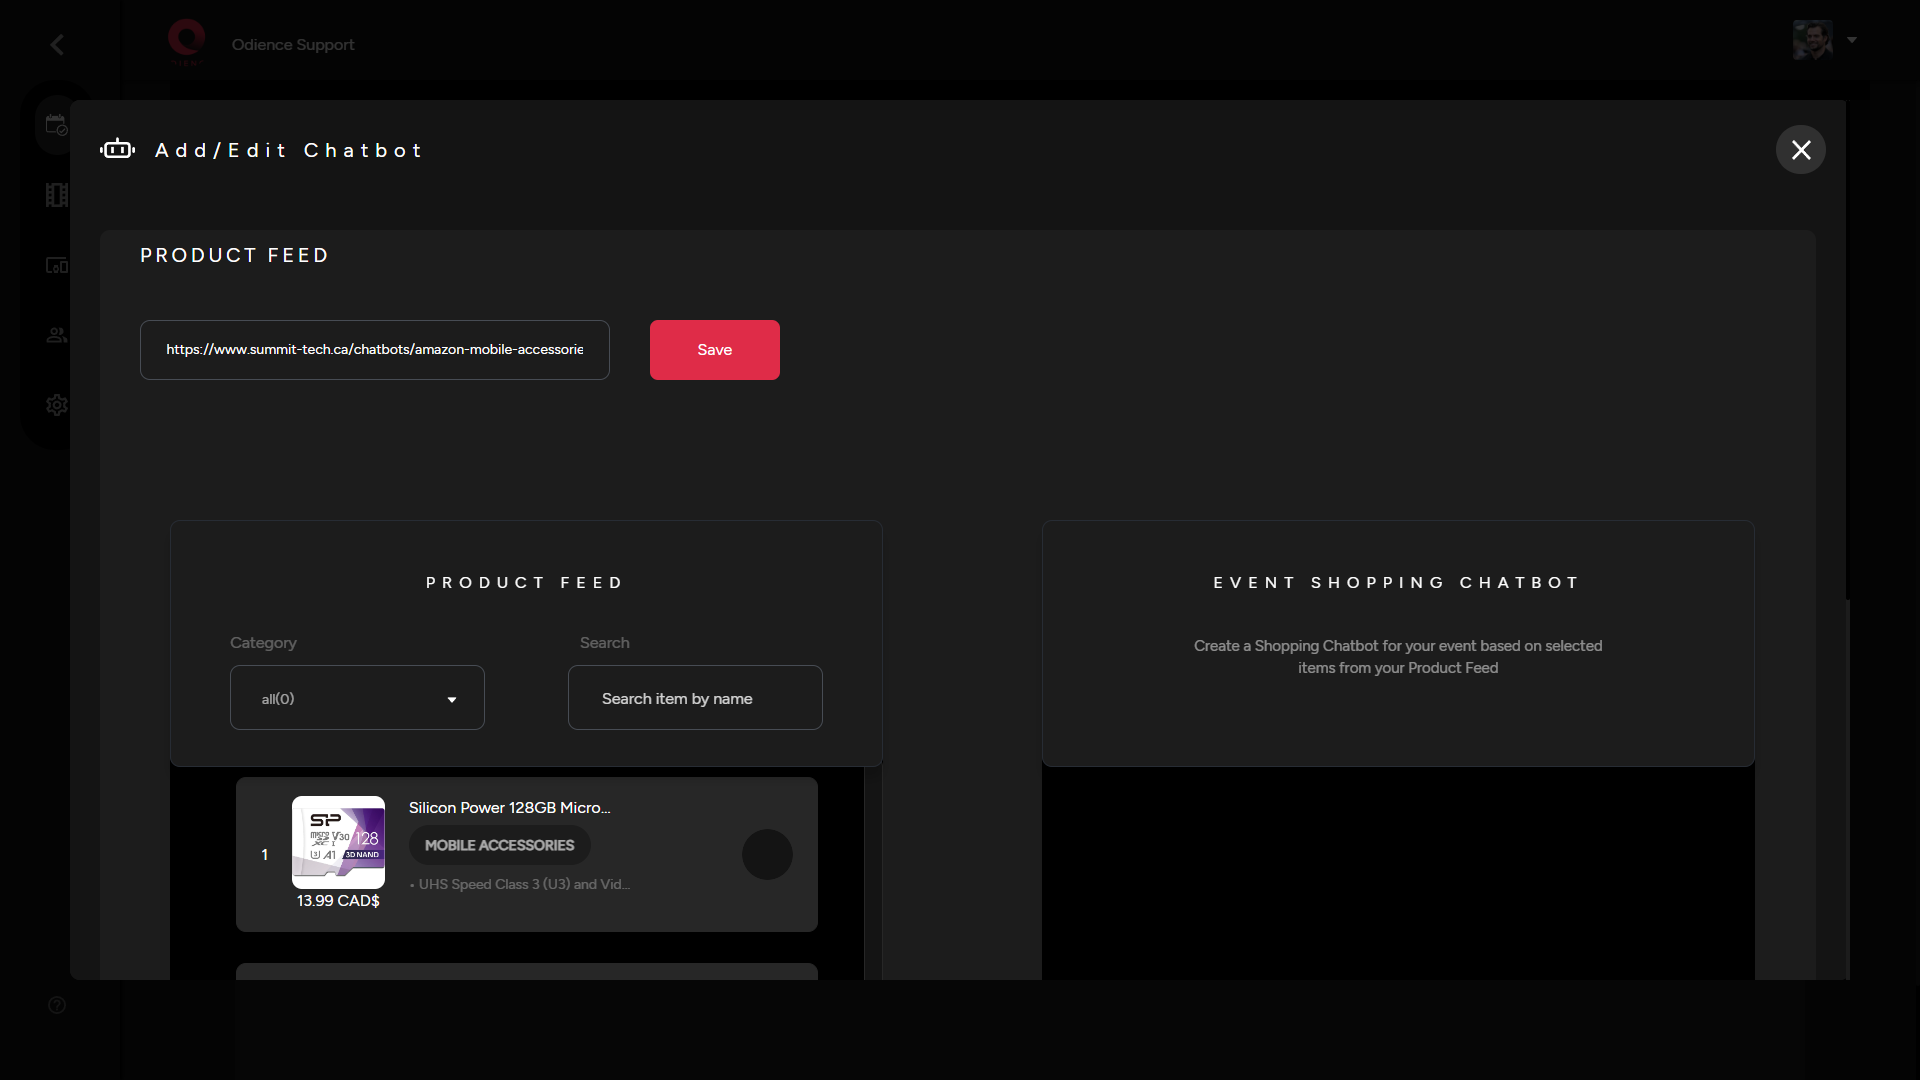
4.1. If Merchant Feed was selected over Ecommerce, you will need to provide an XML product feed URL (see screenshot below for reference). All steps before and after stay the same regardless of the shopping source.
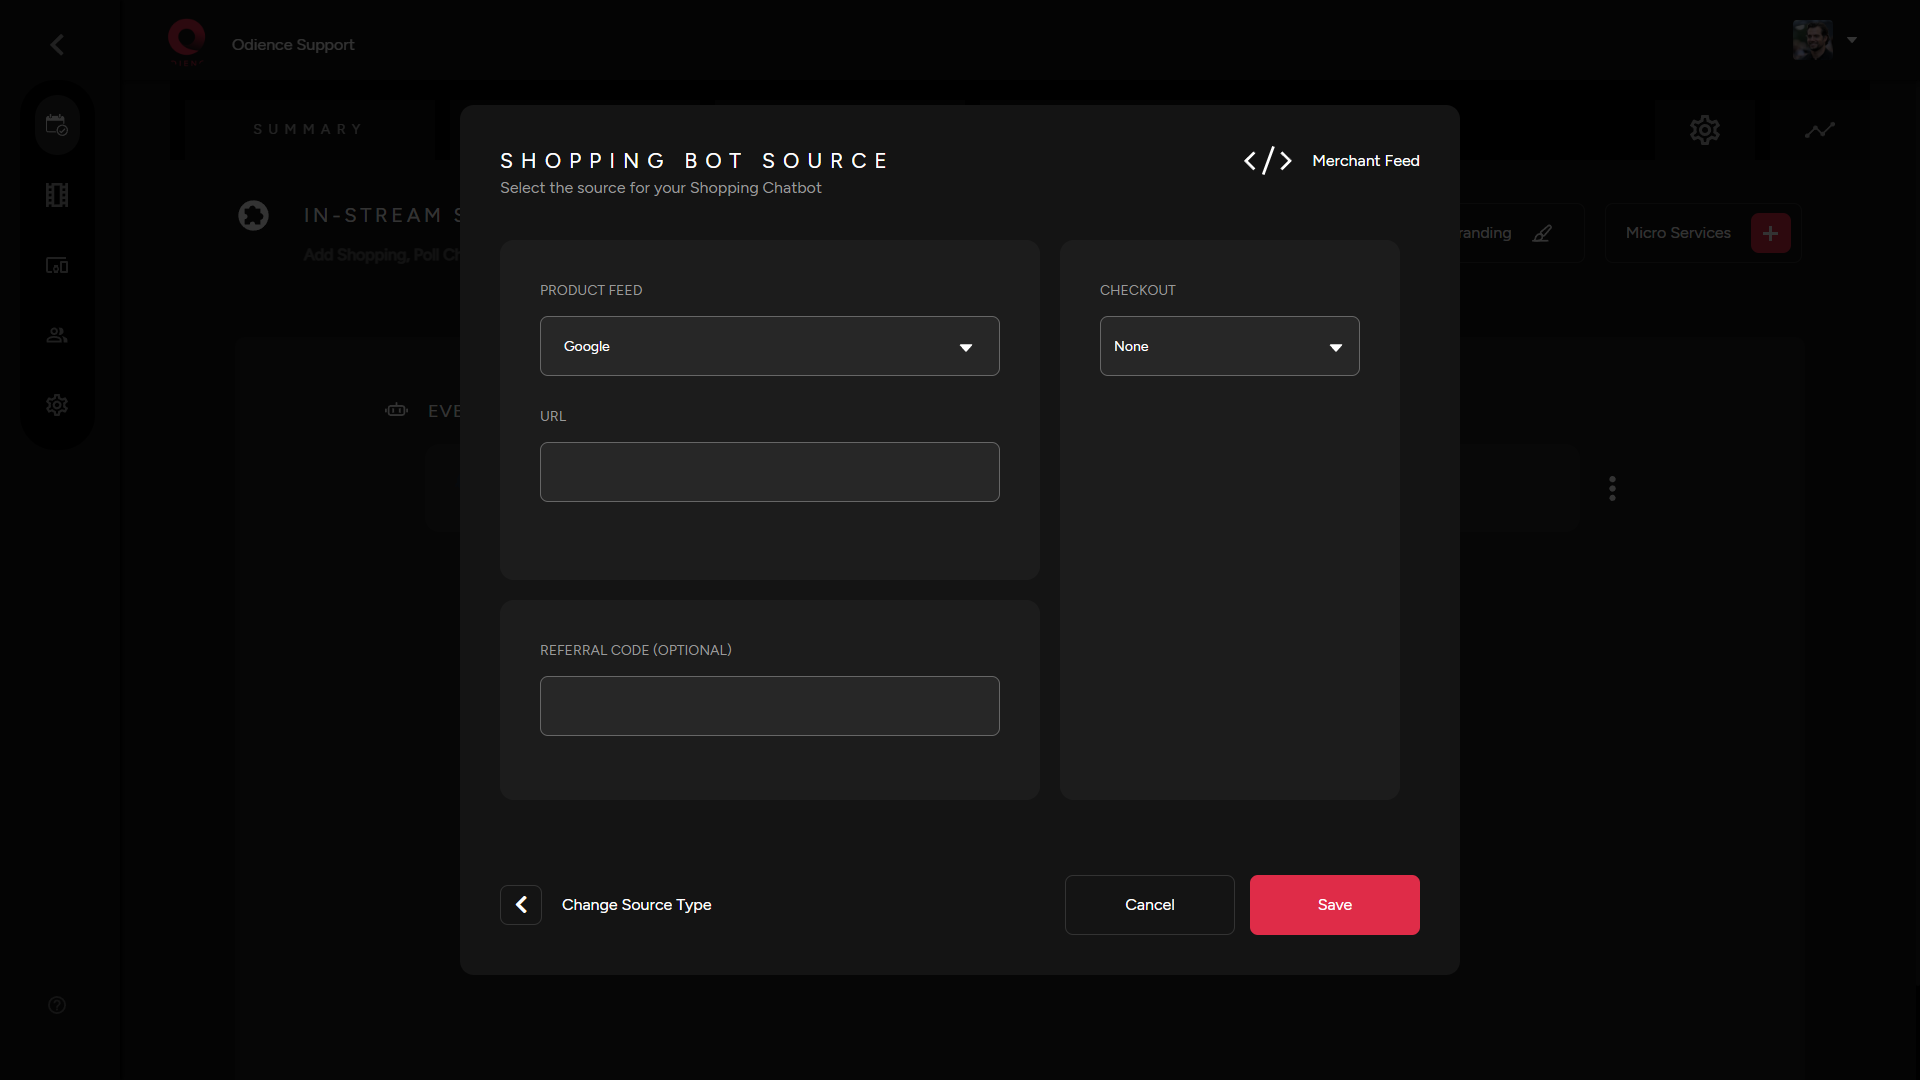
- Note: Odience supports the use of Google, Amazon & other XML merchant feeds.
5. Select checkout platform & Click Save.
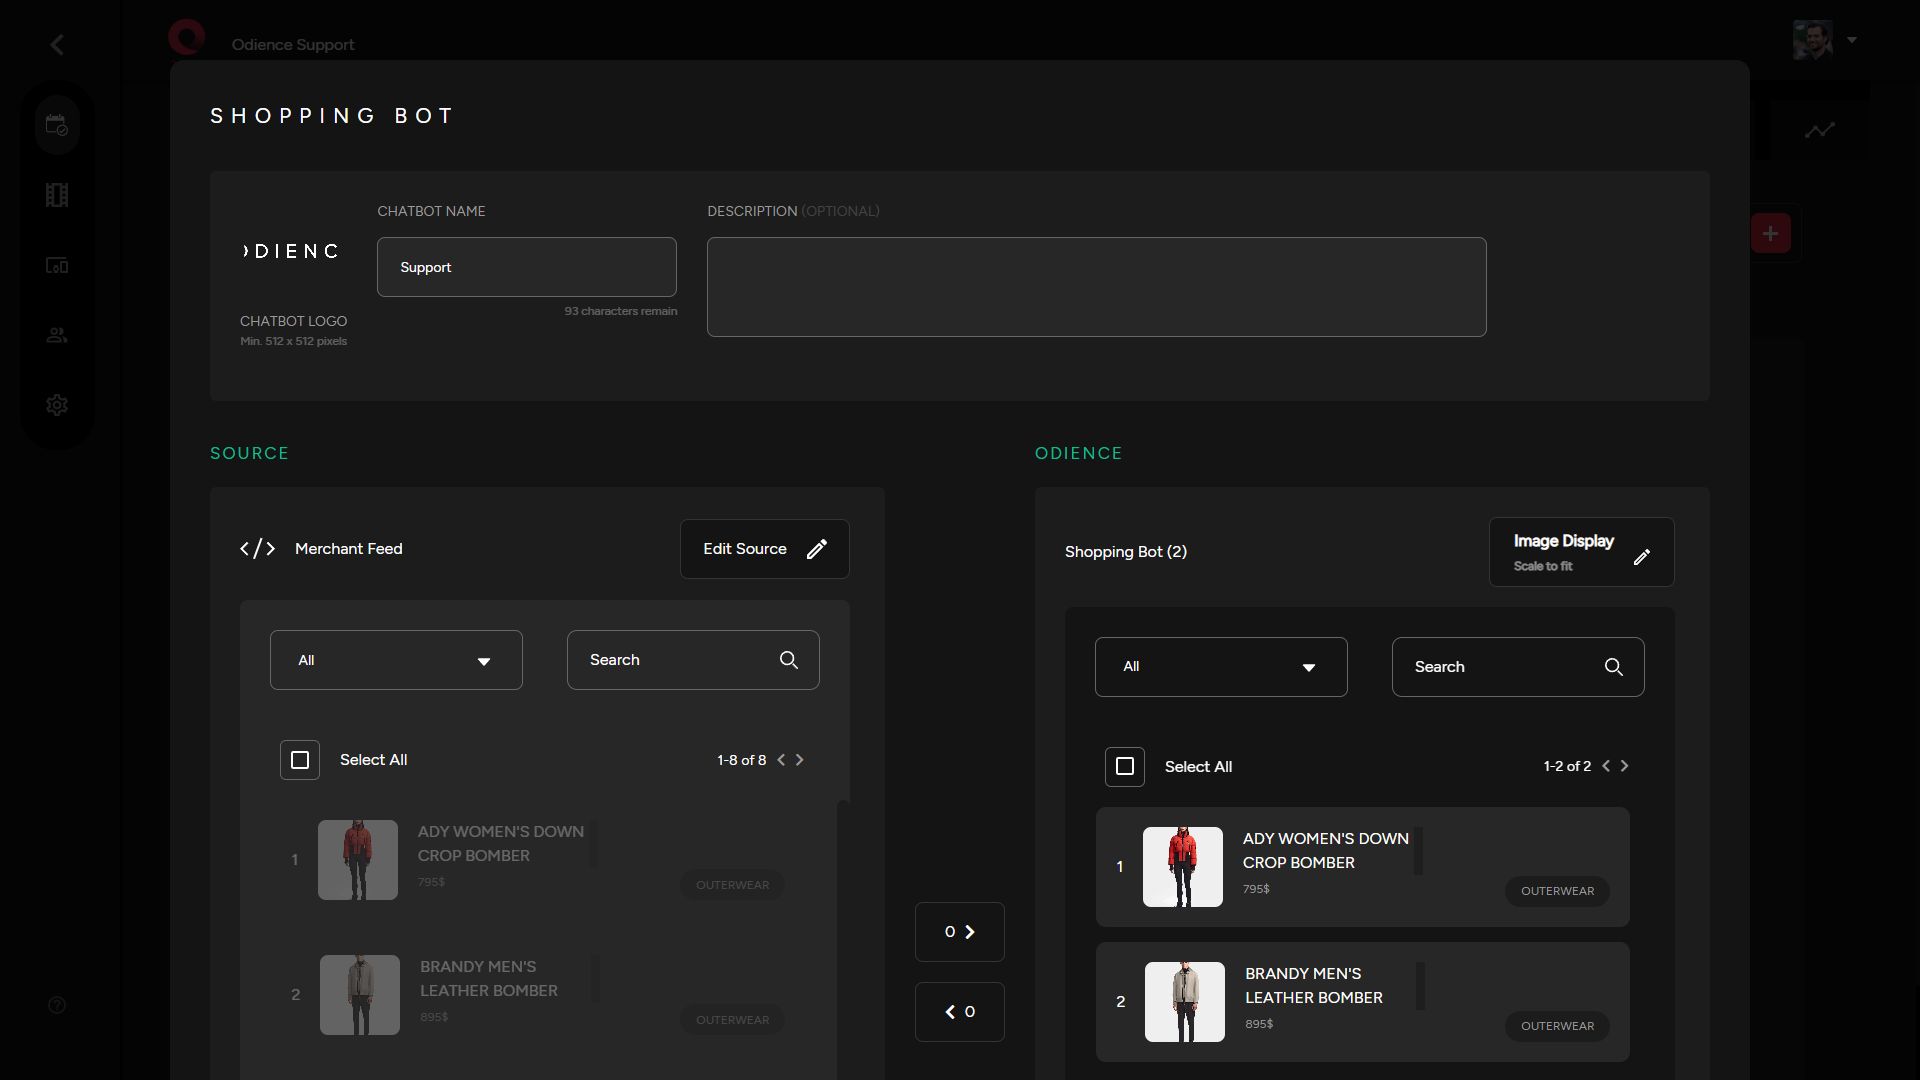
6. Add a Chatbot Logo, Name, Description (optional) & then select which products from your source you want to include in your Odience shopping chatbot.
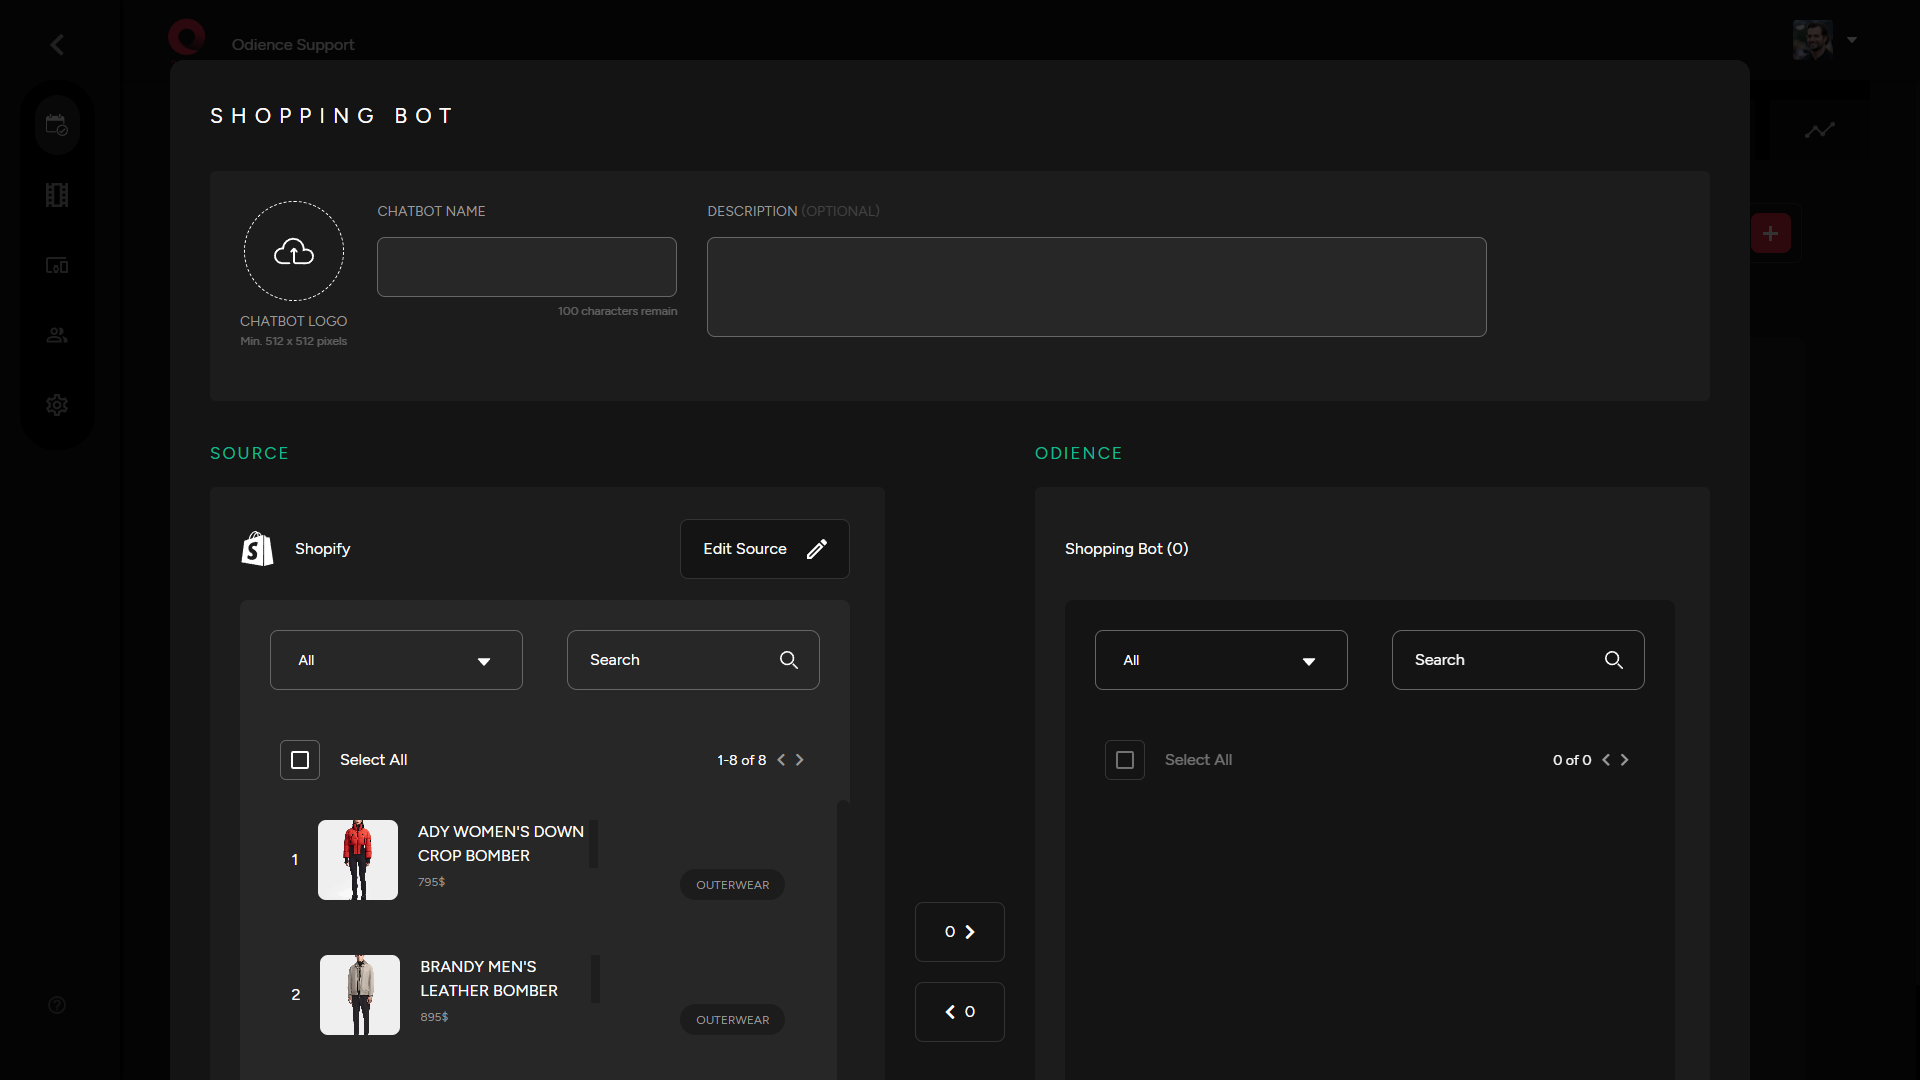
8. Click save to add Chabot to your event. The information can be edited.
Edit Chatbot
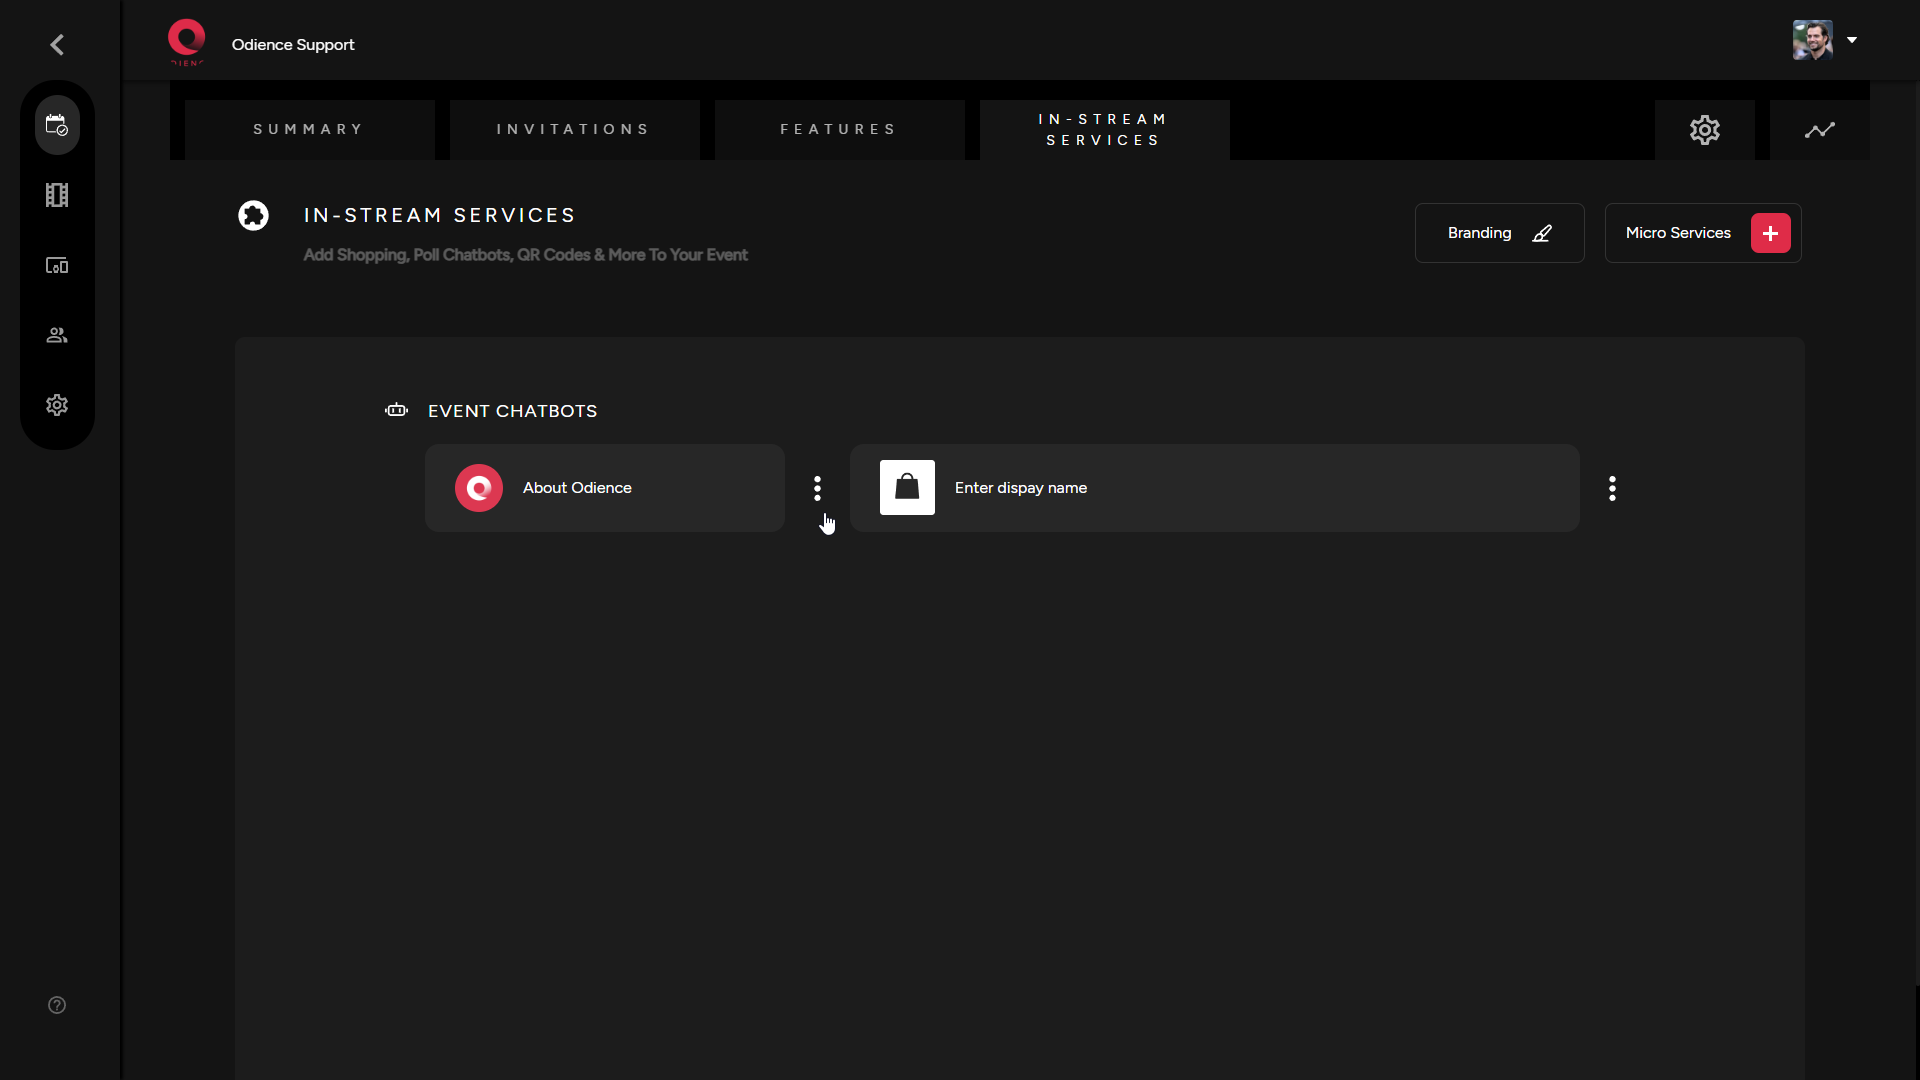
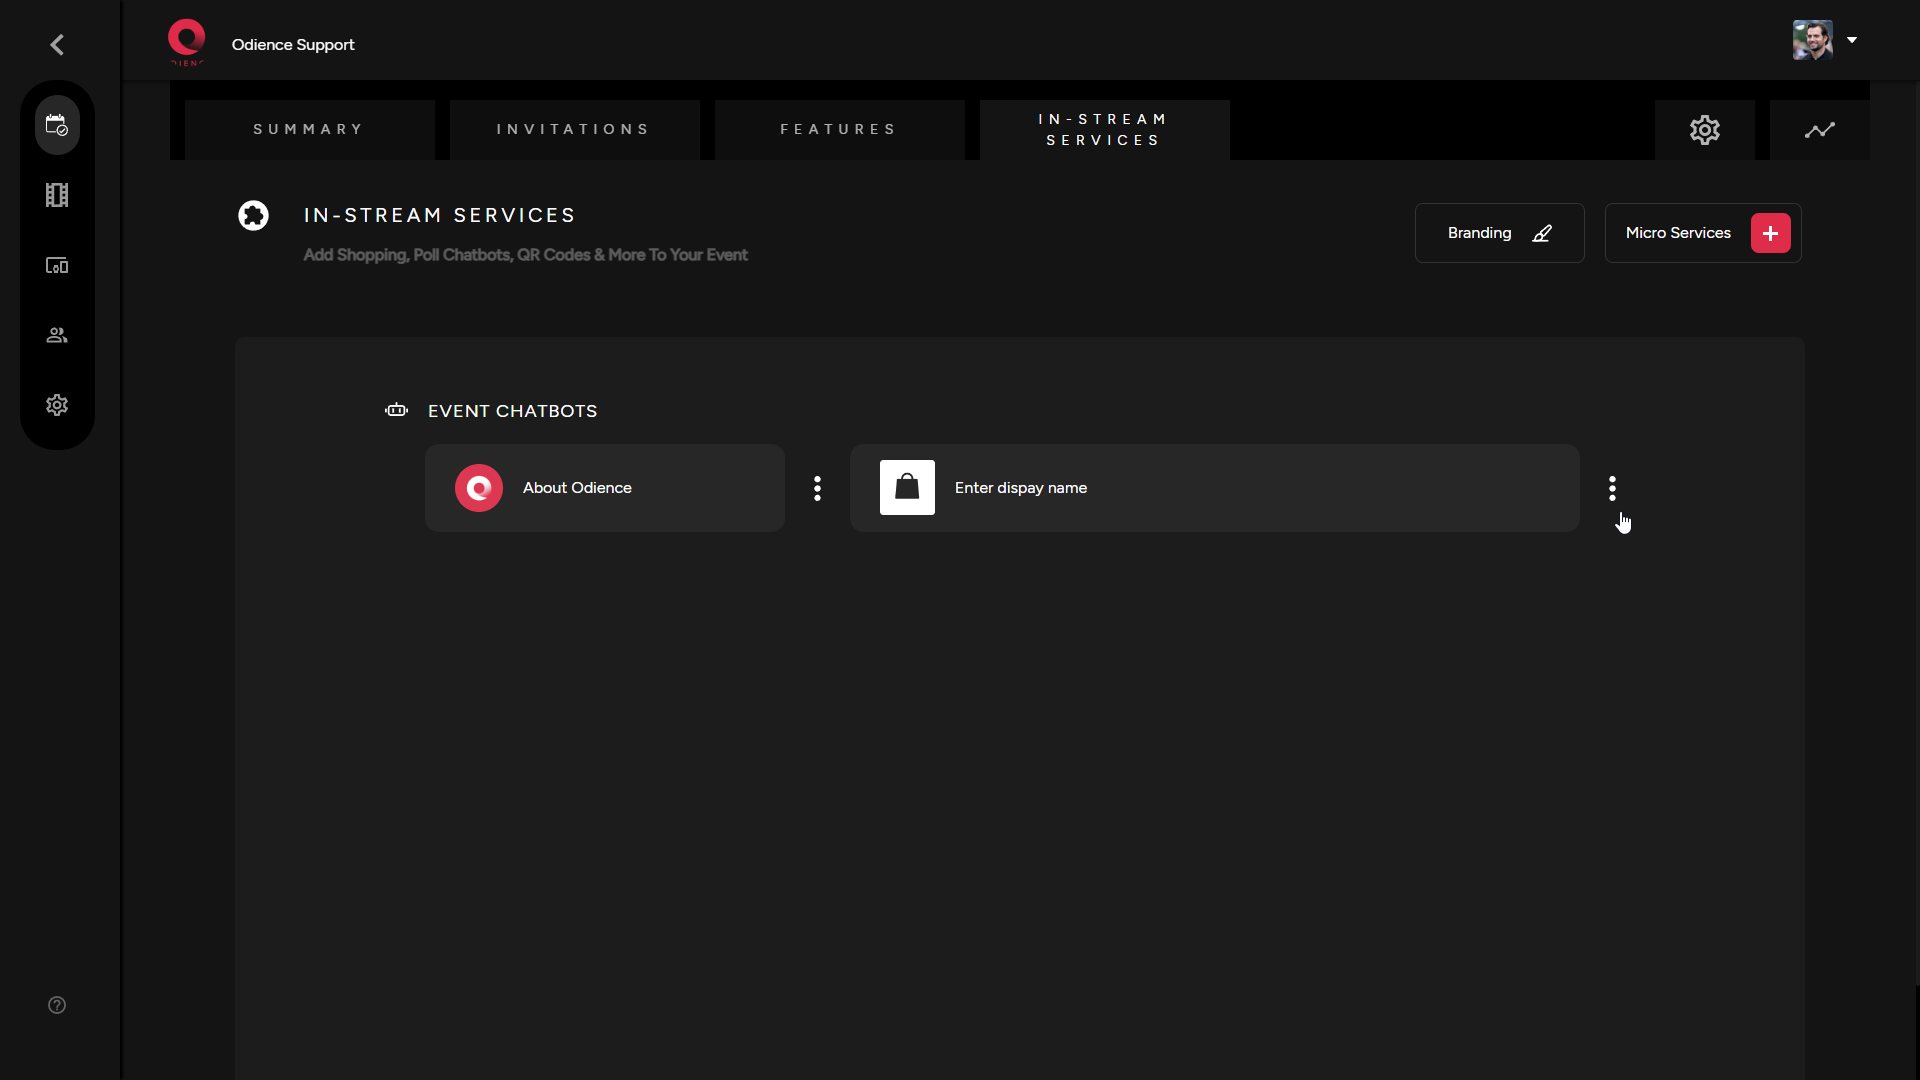
1. Select the stacked bullets for more options and click Edit.
2. Edit Chatbot Name, Description and Products used in your chatbot. Click Save to confirm changes.
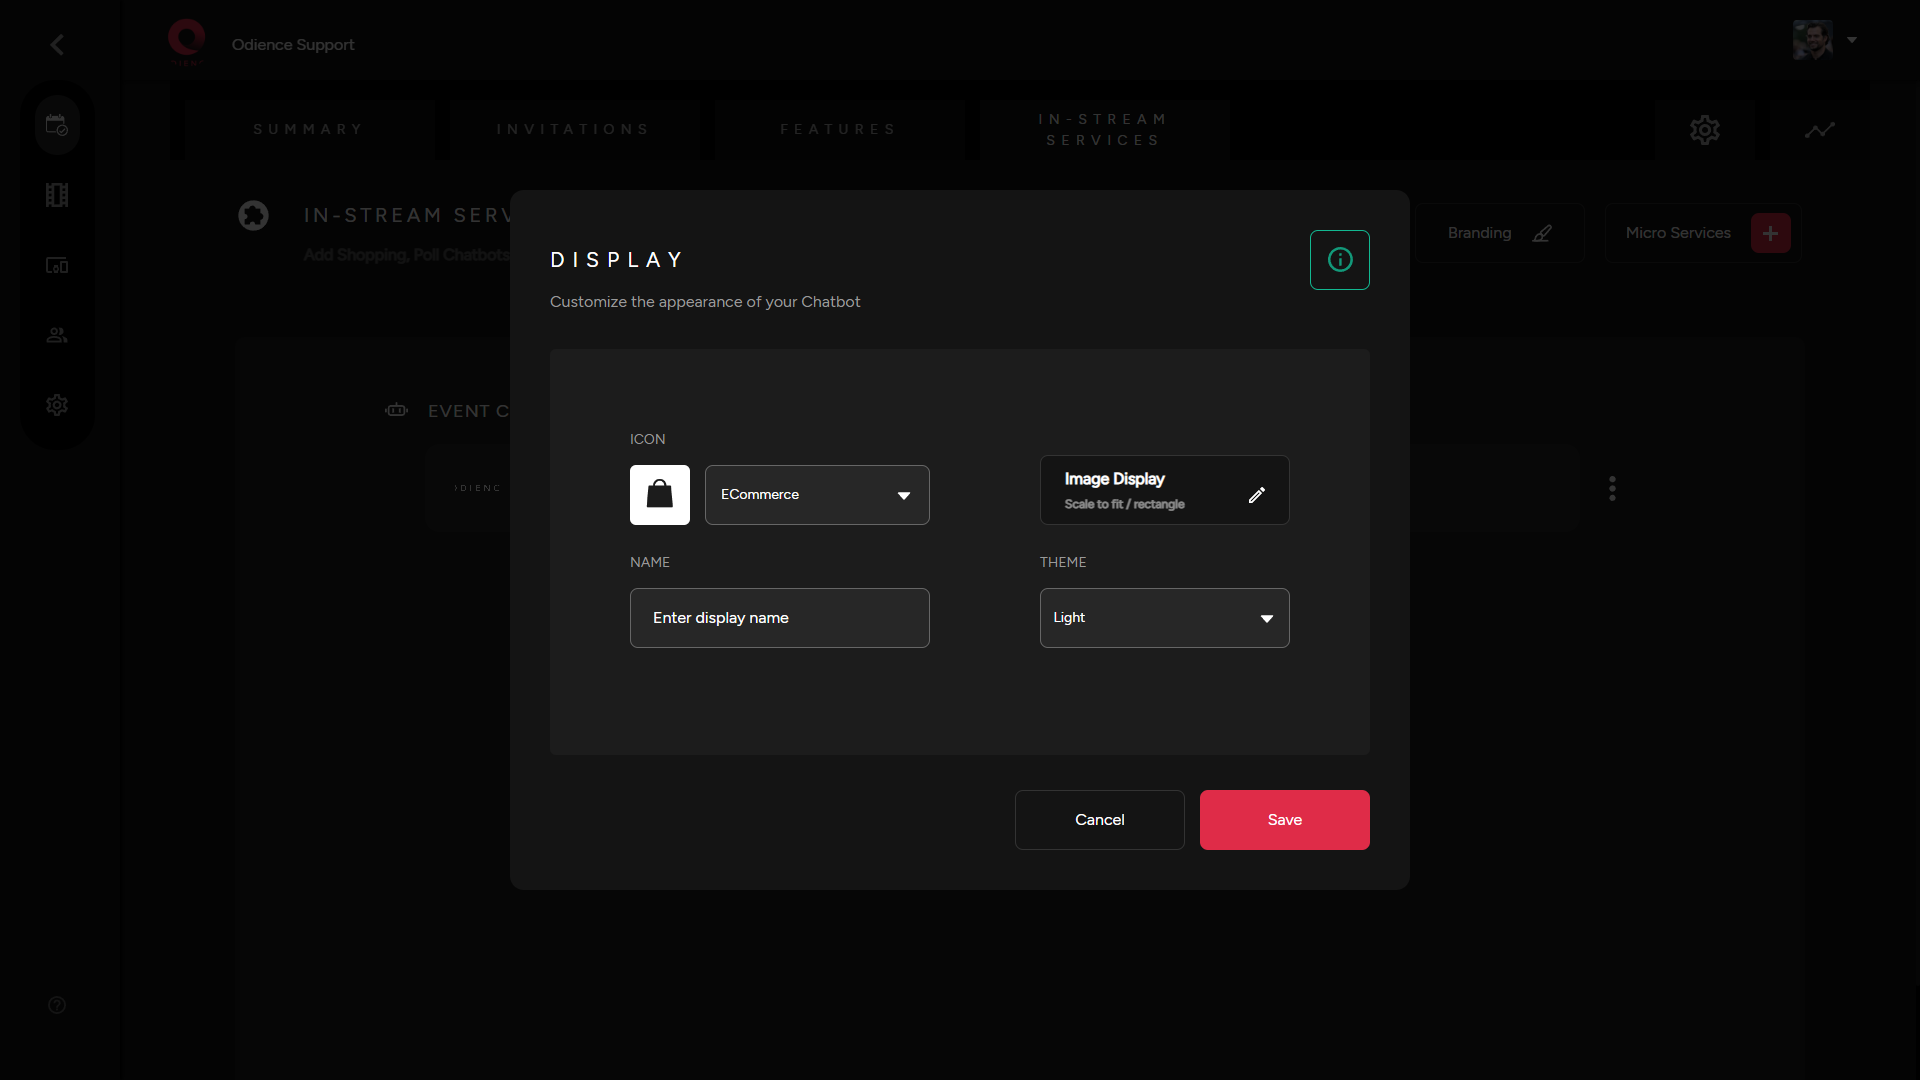
Customize Appearance
1. Select the three stacked bullets on the right side of your chatbot.
2. Customize the appearance of your chatbot. Click Save to confirm changes.

Poll Bot
Create Poll Bot
1. Start by selecting Poll in your Quick Start or by selecting Add Chatbot in your Micro Services dropdown.
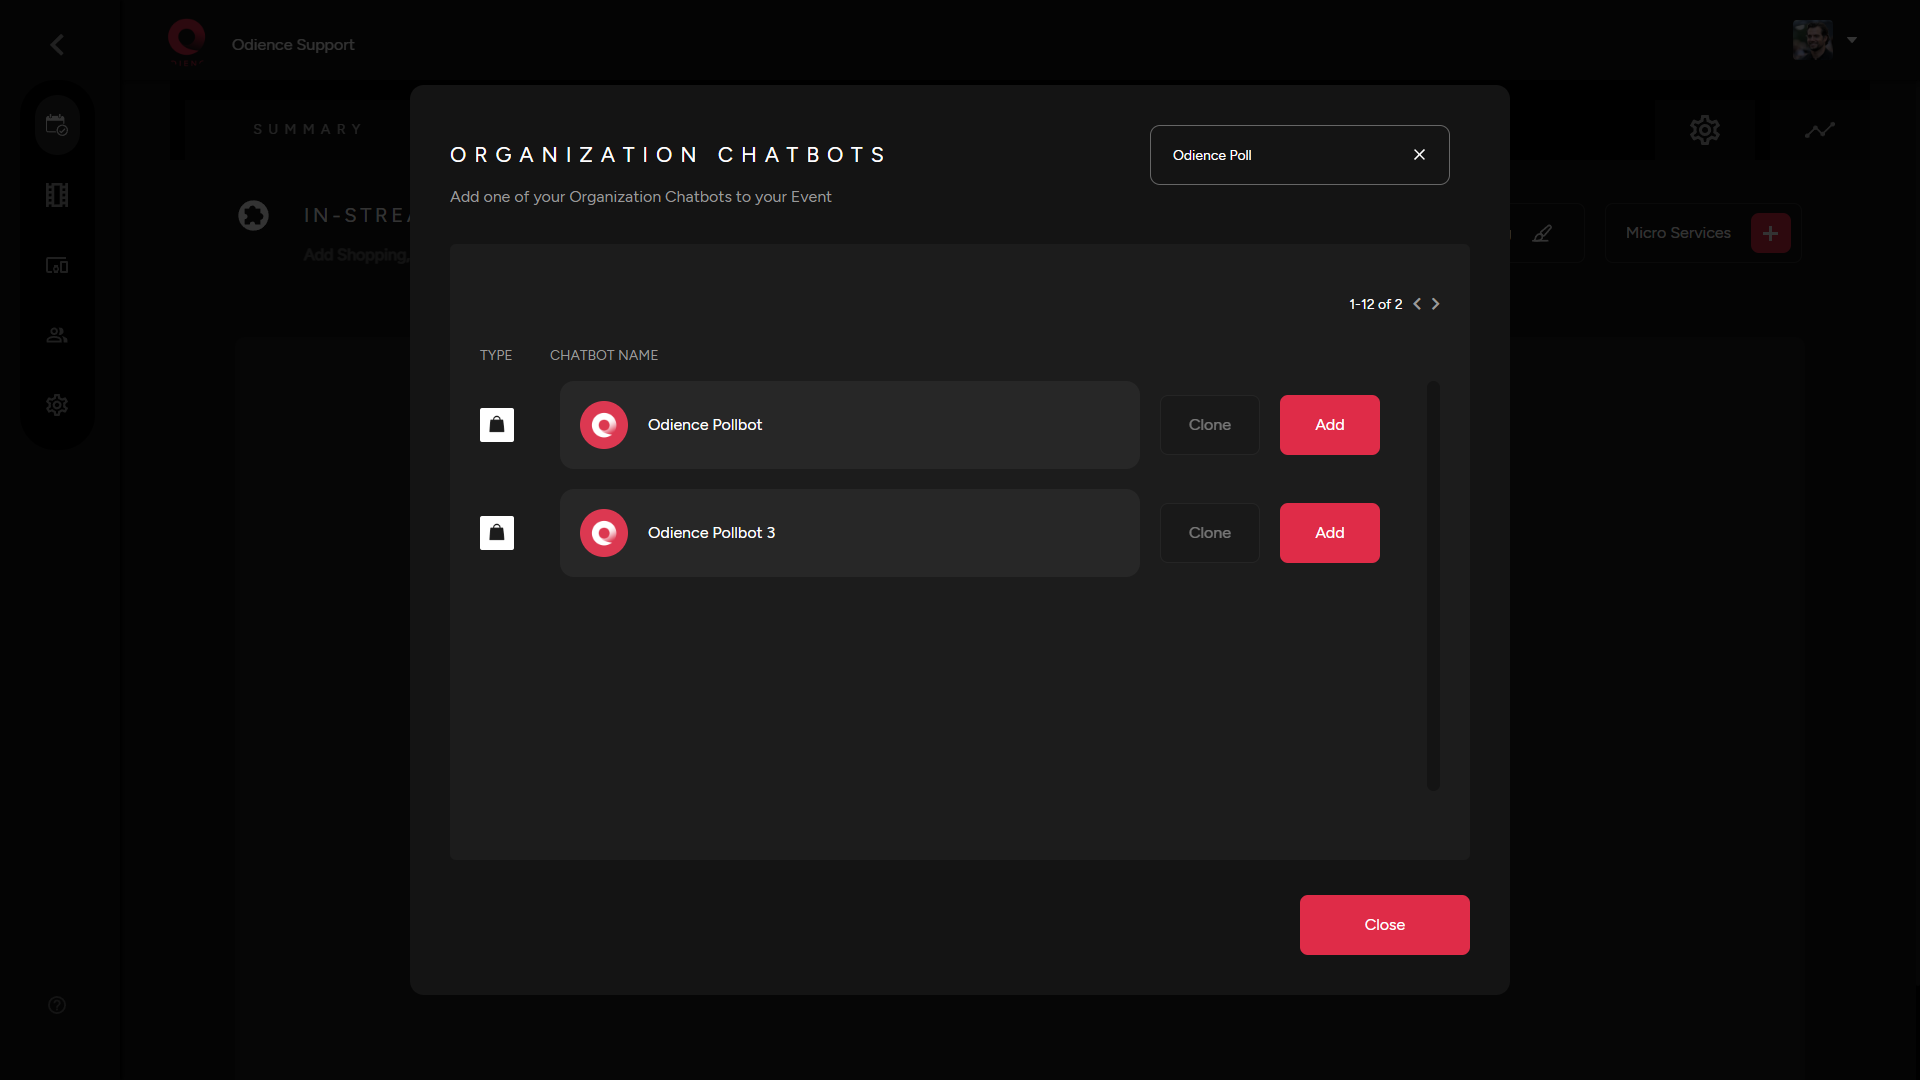
2. Add a chatbot from your Organization.
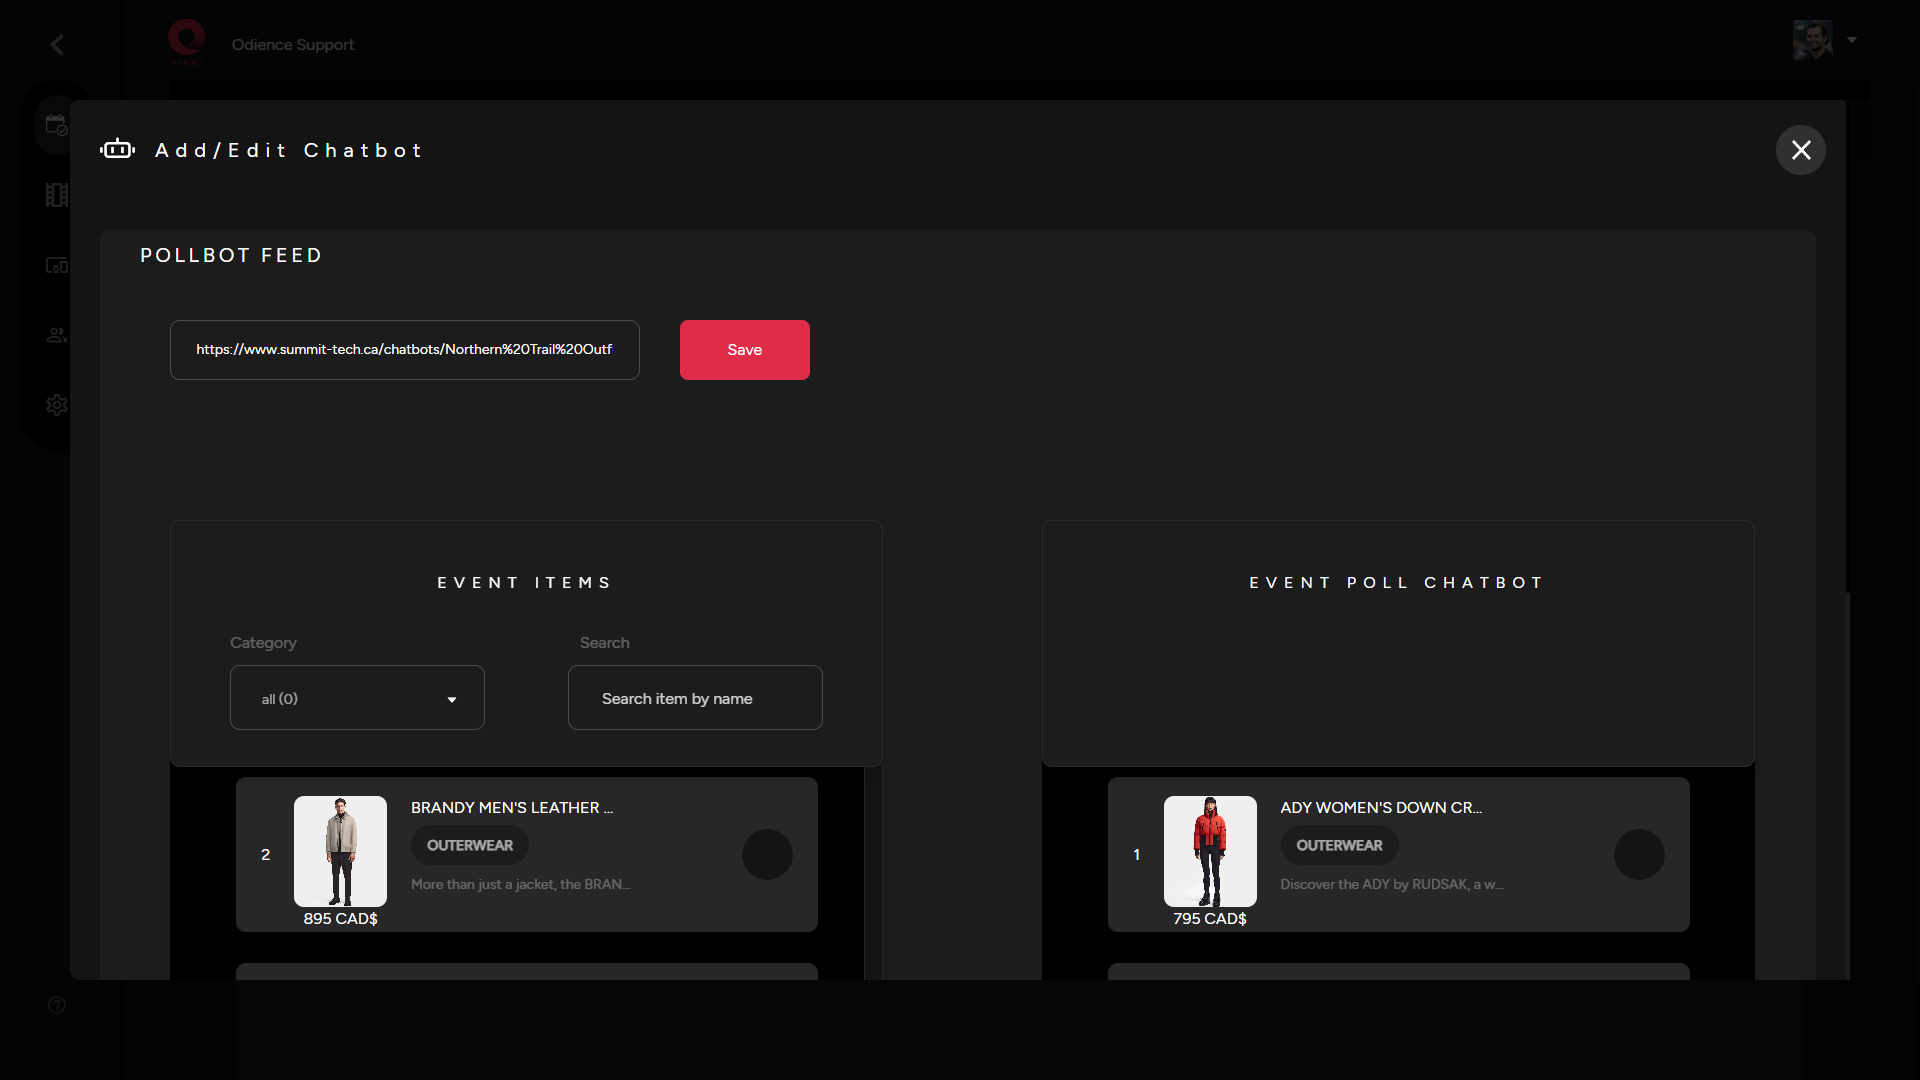
3. Add or edit Poll Feed by selecting the extra options right beside your Poll Bot. Select which products you want to include & then click Save
Customize Appearance
- Select the three stacked bullets toward the right side to customize the appearance of your chatbot. Click Save to confirm changes.
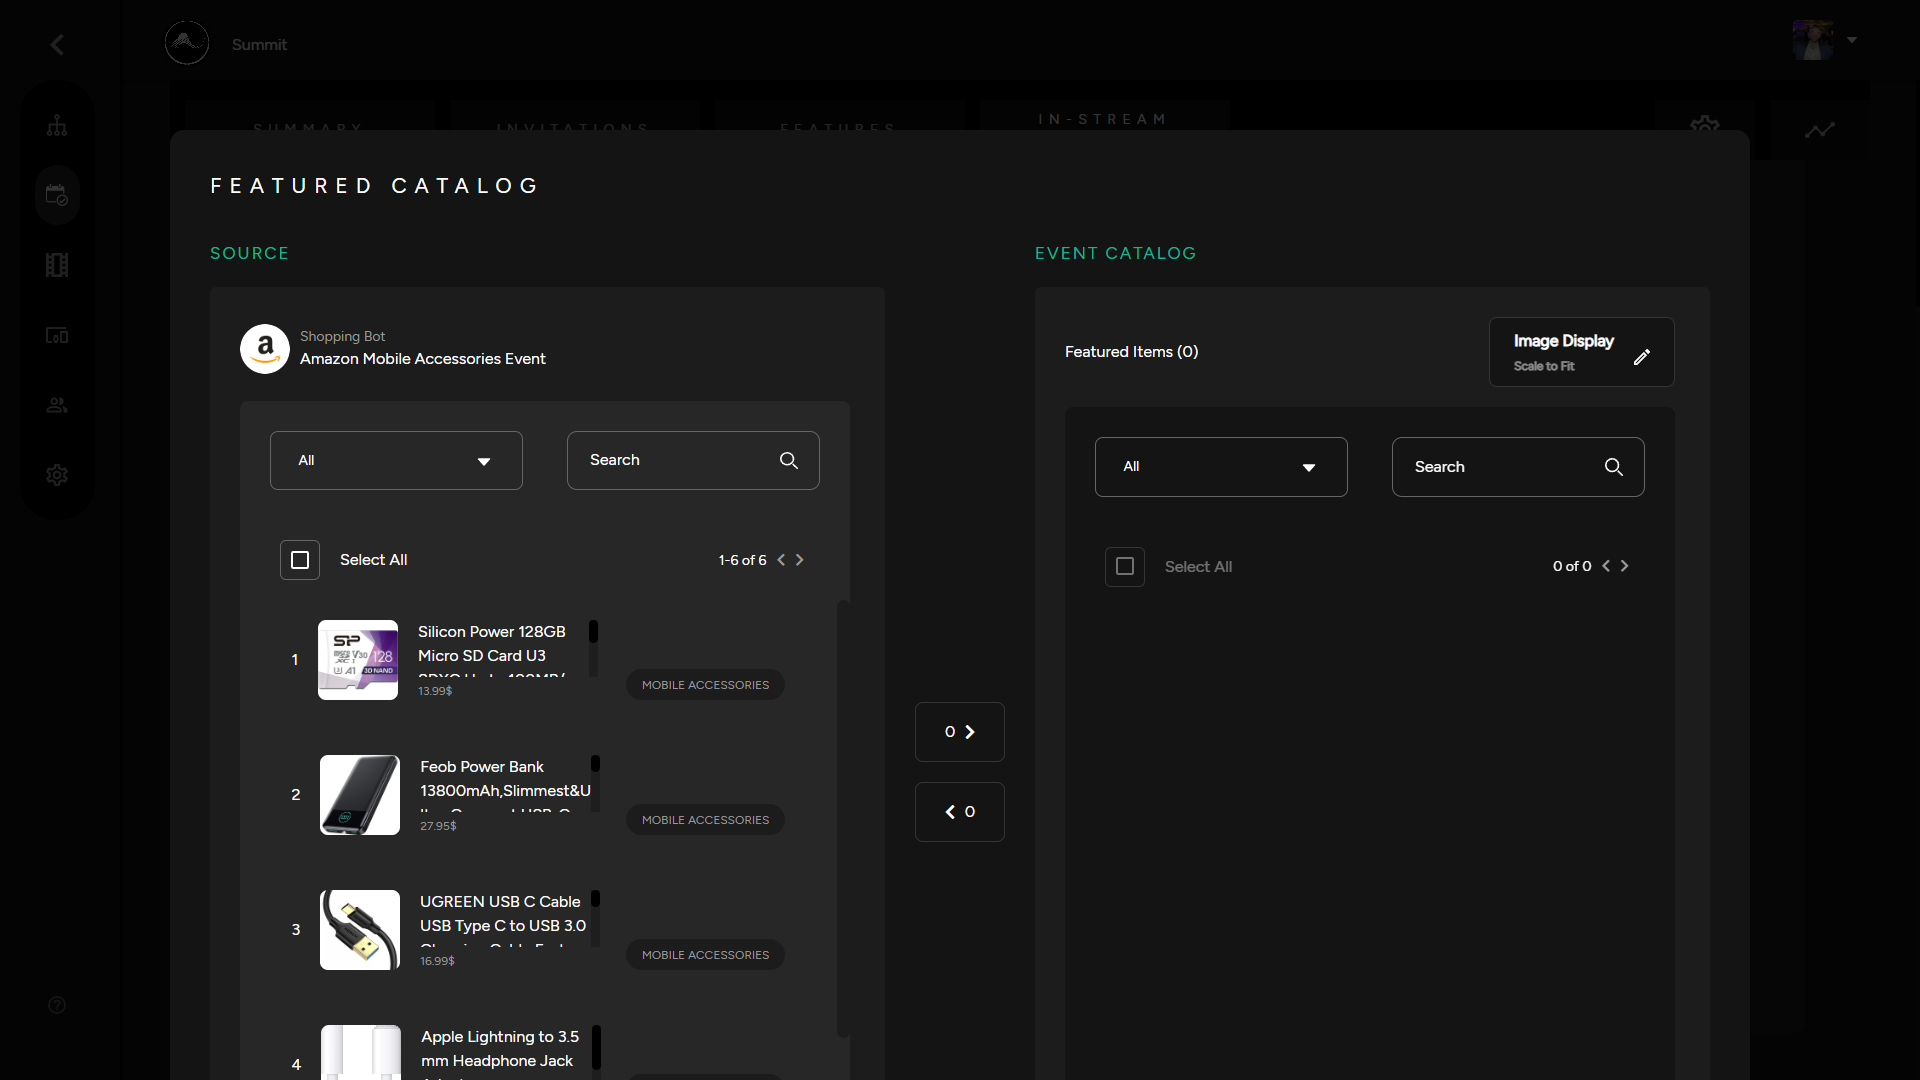
Featured Catalog
Create Featured Catalog
Note: If you don't have a shopping chatbot, you will need to create one first. Refer to our step-by-step guide on how to a Create a shopping chatbot.
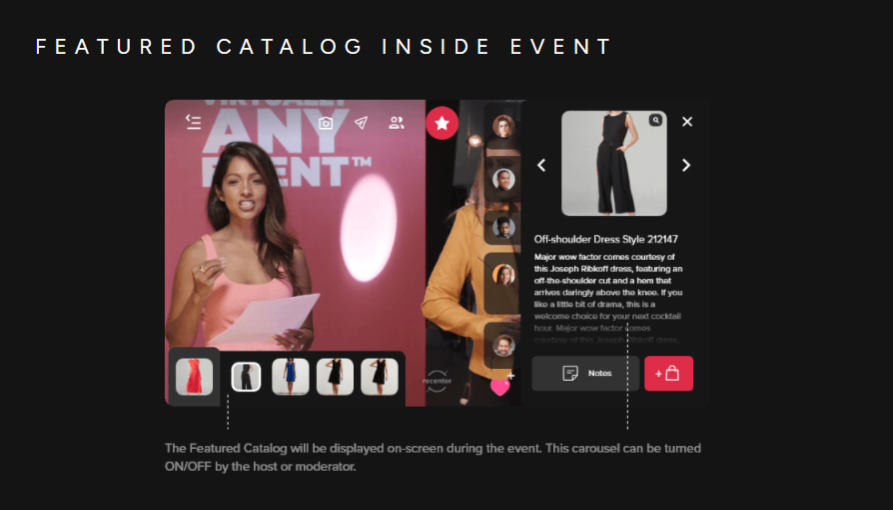
1. In the "Micro Services" drop down, select "Featured Catalog". Add a shopping chatbot from the Directory as the source.

2. Edit Poll Feed to select which products you would like to be featured in your event catalog.
Custom Featured Catalog
- You can create a custom Featured Catalog by adding an XML product feed as the source of your Custom Featured Catalog.
1. Add your Product Feed URL, Click Save to add products, then choose which products you would like to include in your catalog.
2. Click Save to apply your custom Featured Catalog.
Chatbot Directory
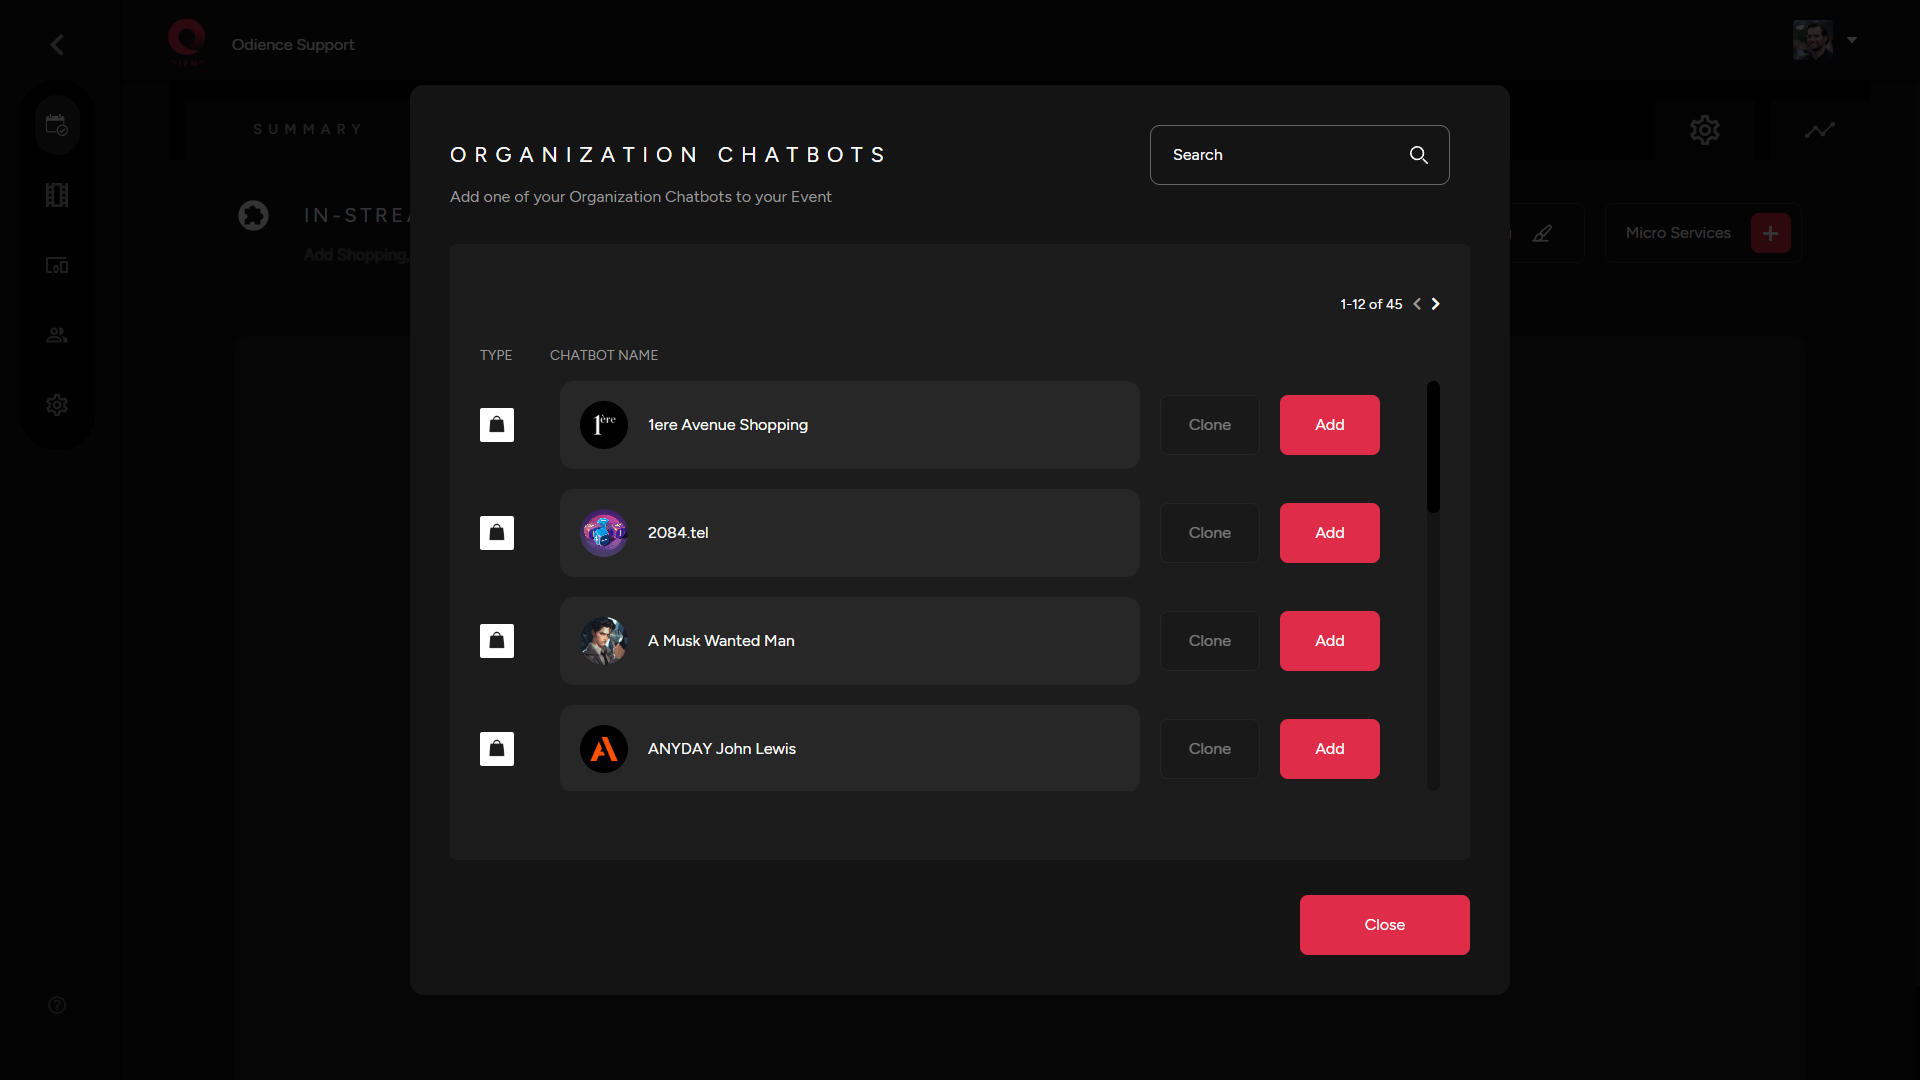
Organization Chatbot Directory
The organization directory is a list of all your organizations chatbots. You can reuse or repurpose any previous chatbots that were created.
- No chatbots in your organization yet? See our guide on how to create your own custom Event Chatbot.
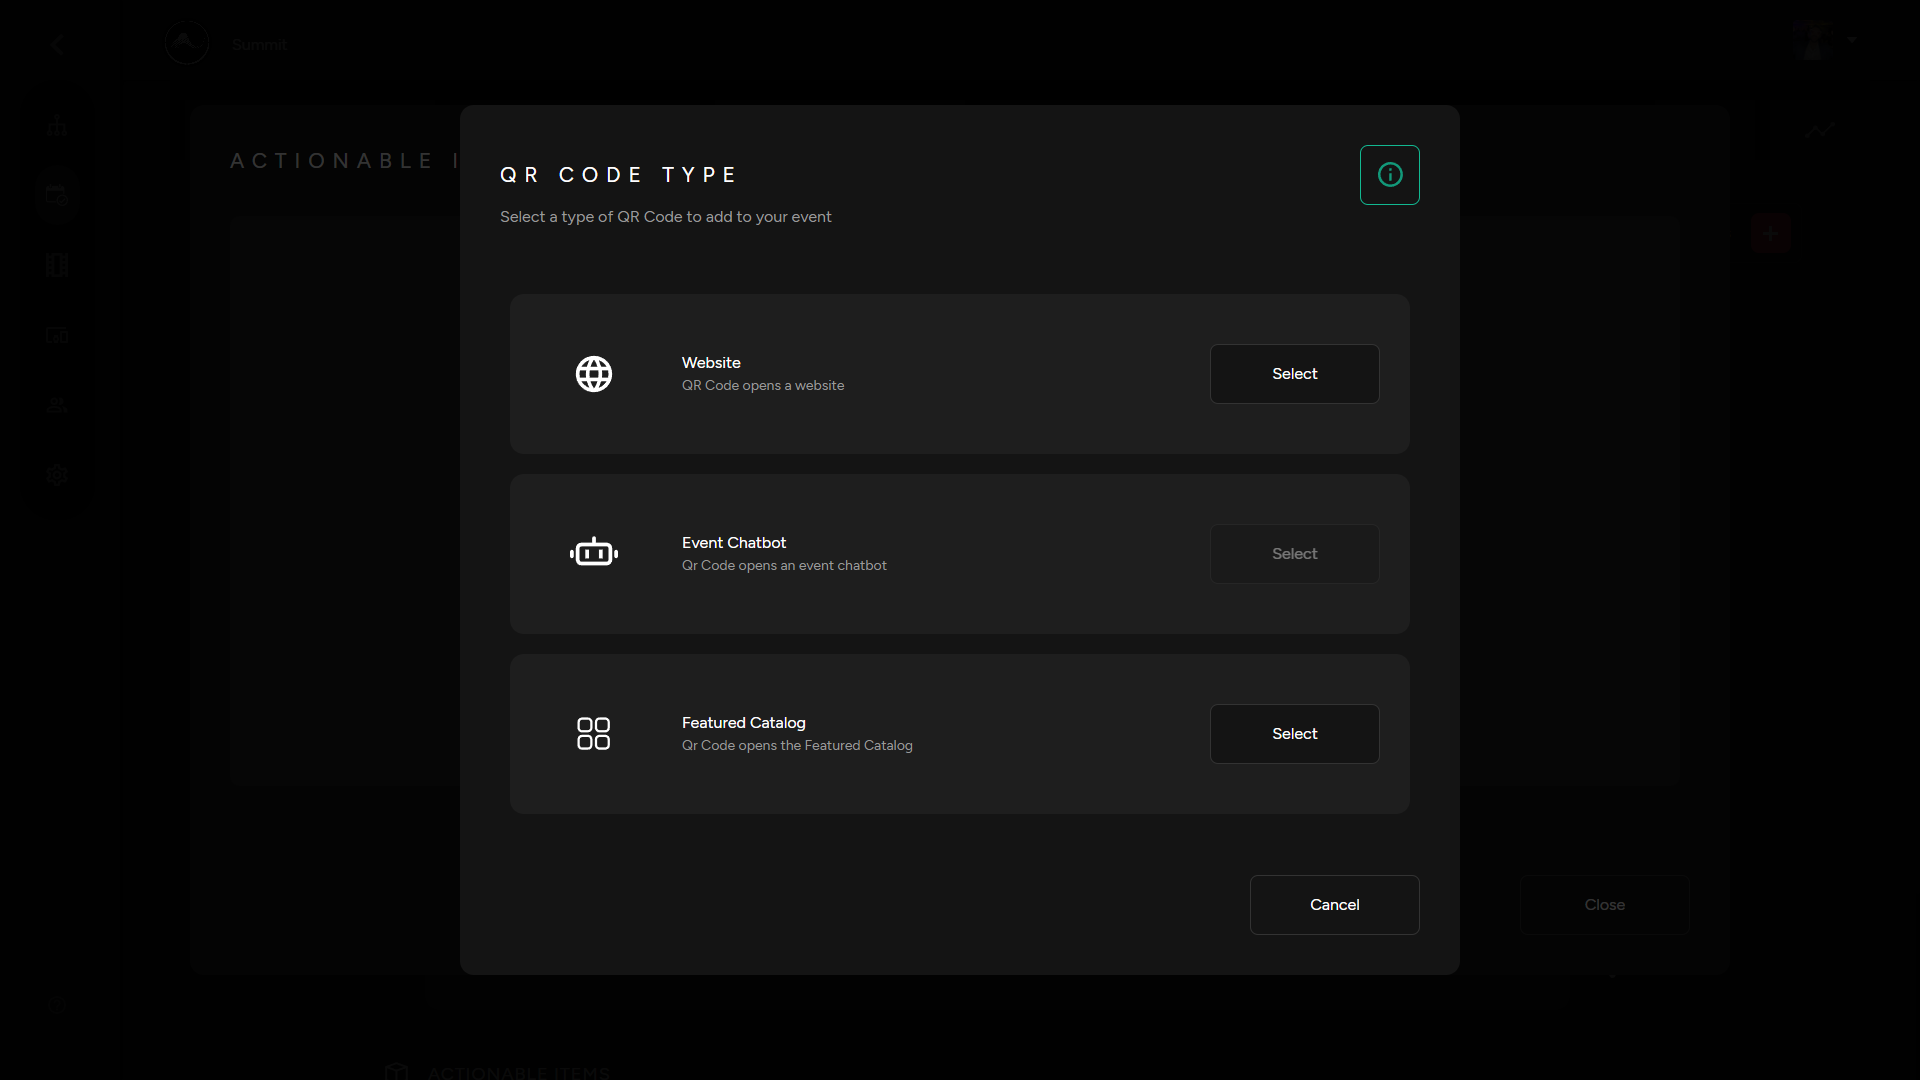
Actionable Items
Create QR Codes Interactions
1. Select "Actionable Items" in your Micro Services drop down. Then Select the QR code type you would like to generate from the three options below.
- QR Code that opens a website
- QR code that opens up an Event Chatbot. See our guide on to create your own Event Chatbots.
- Connect a QR code to a Feature Catalog. See our guide on how to create your own Featured Catalog.
Add QR Code Tablets
1. From your instream services section, scroll to “Actionable Items” then click the QR code icon corresponding to the item you want to set-up a QR code for.
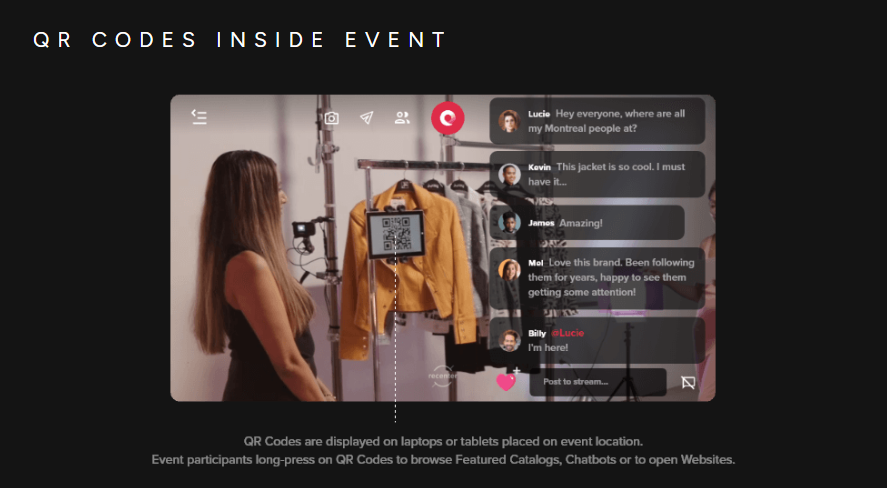
2. You will now have the QR code open in its own tab, ready to be used and placed within your event environment for viewers to interact with.