Event Creation
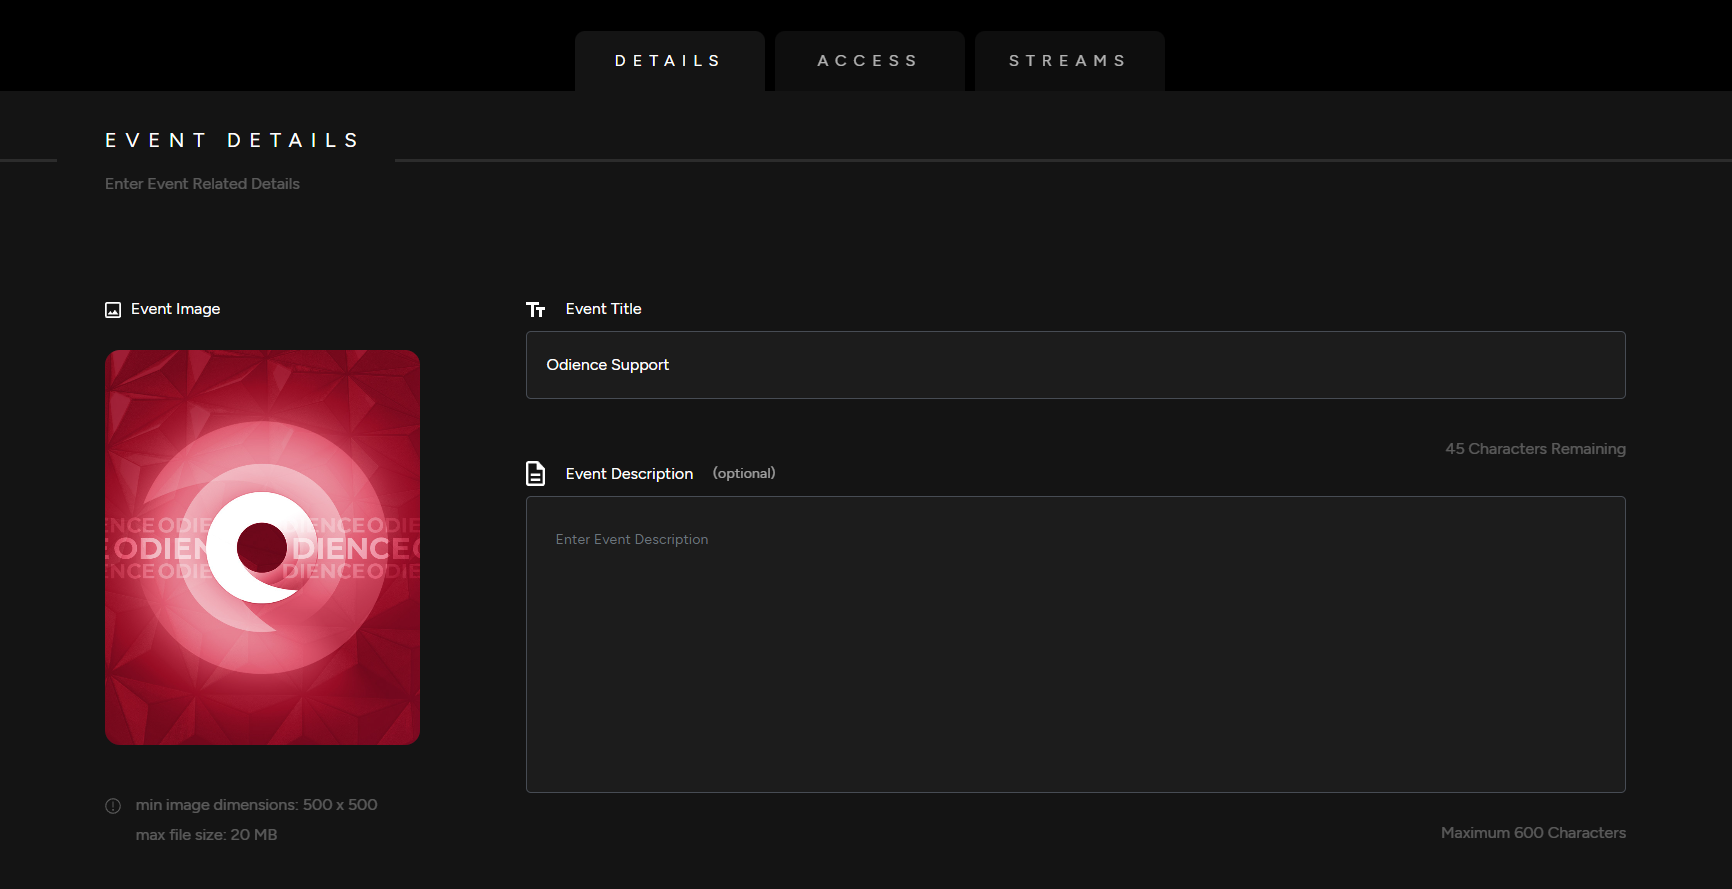
Details
1. Enter your your Event Details, Add a Title, Event Image & Description (optional).
Event Type
2. Pick an Event Type.

Listing Add Ons
Note: All Listing Add Ons are optional.
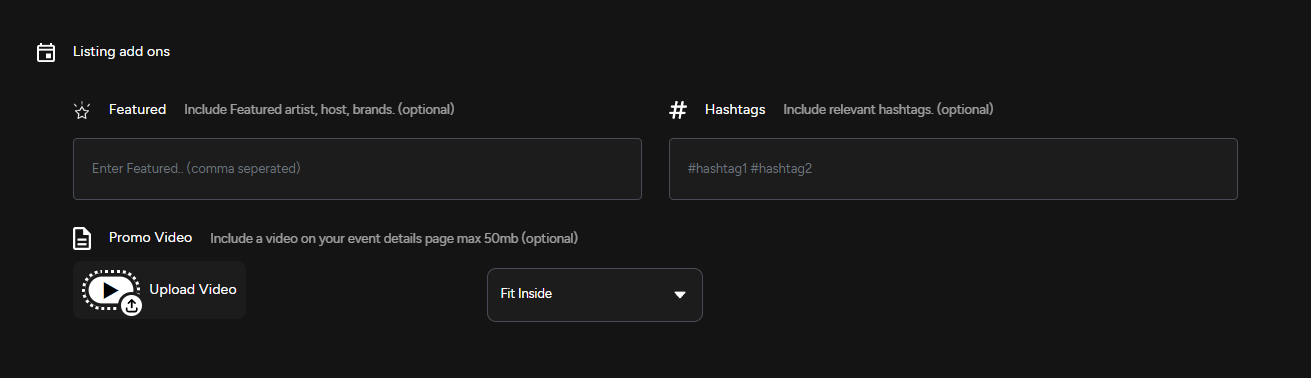
3. Include featured artists, host and brands. Use relevant hashtags & upload a promo video to engage your audience.
Access
4. Select which Platform your event will be published on. Publishing options include our mobile app, the web client, or using a head mounted display (Supported on all VR headsets, including Vision Pro).
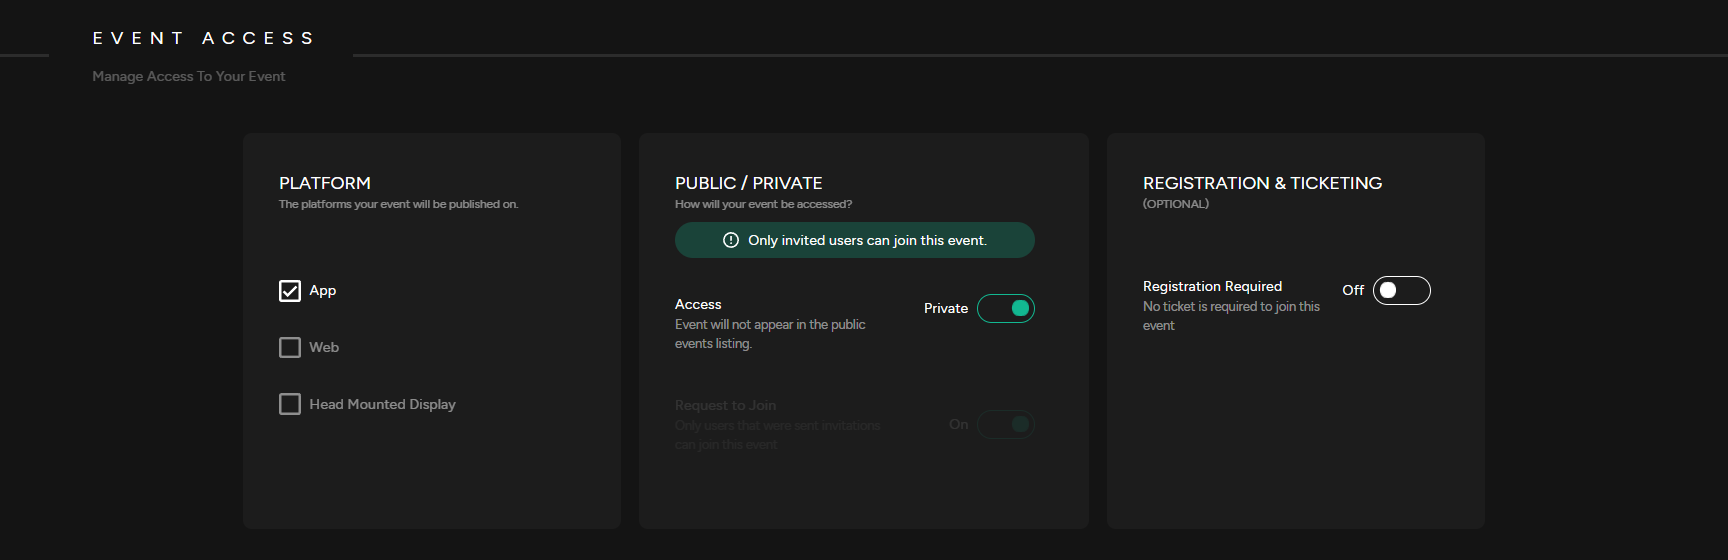
5. Public or Private
- Private Event: A Private Event does not appear in the public events listing. Users will need to be invited to access the event.
- Public Event: A Public Event is listed in the public directory and visible to everyone .
- Request to Join: If enabled, users will need to request to join the event.
6. Registration & Ticketing (optional): Enable registration before joining your event. Set-up a ticketing system that allows you to administer free or paid tickets. Select a platform to distribute your tickets, pick a currency & include ticket classes to sell different types of tickets.

7. Select the Start/End date of your event, set a capacity & add an event location (optional)
Streams
8. Pair a Camera by scanning QR code pop up or create and assign an RTMP stream to your event.
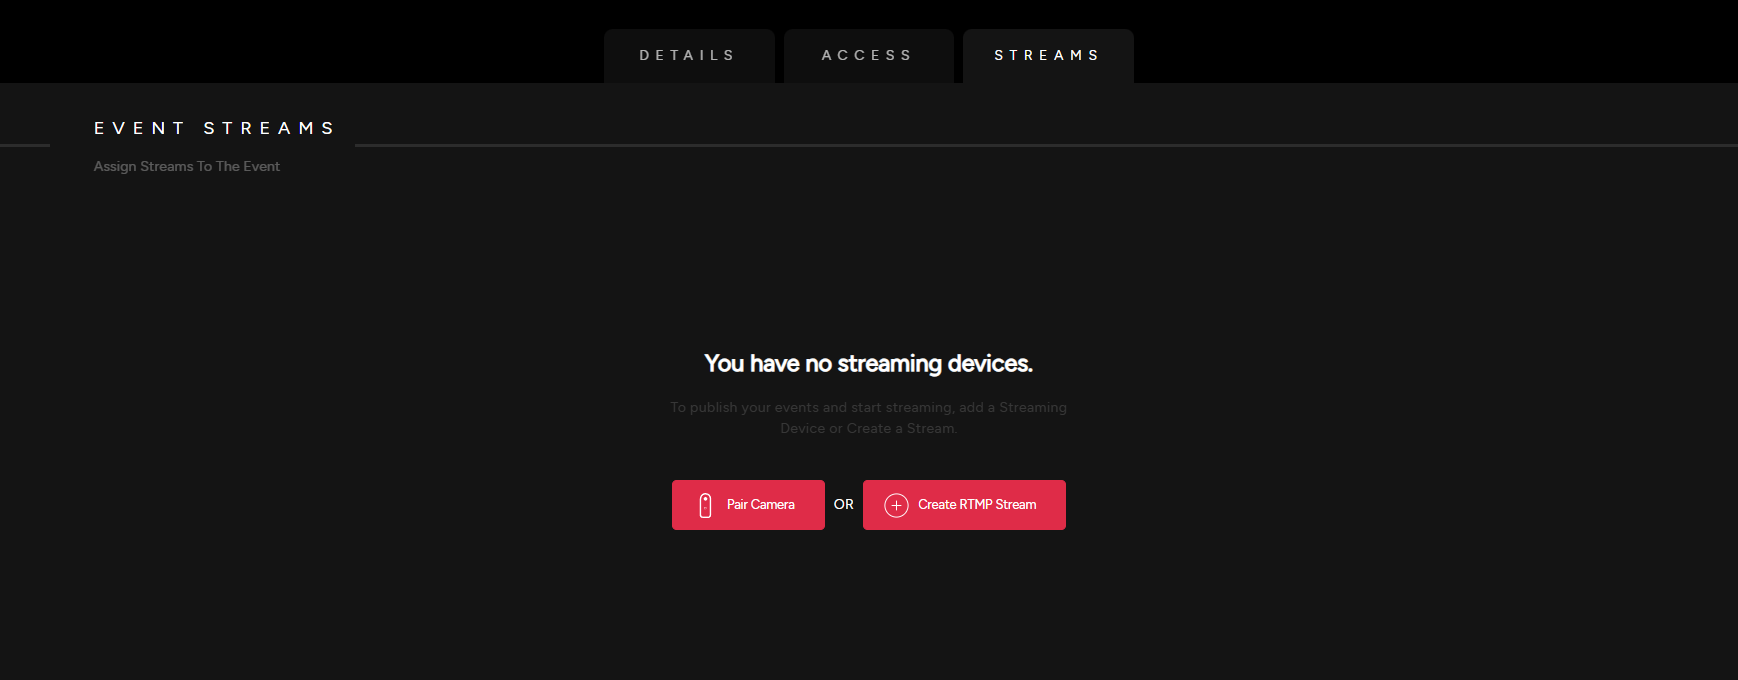
- See our detailed guide on how to Create an RTMP Stream.