Event Creation
Details
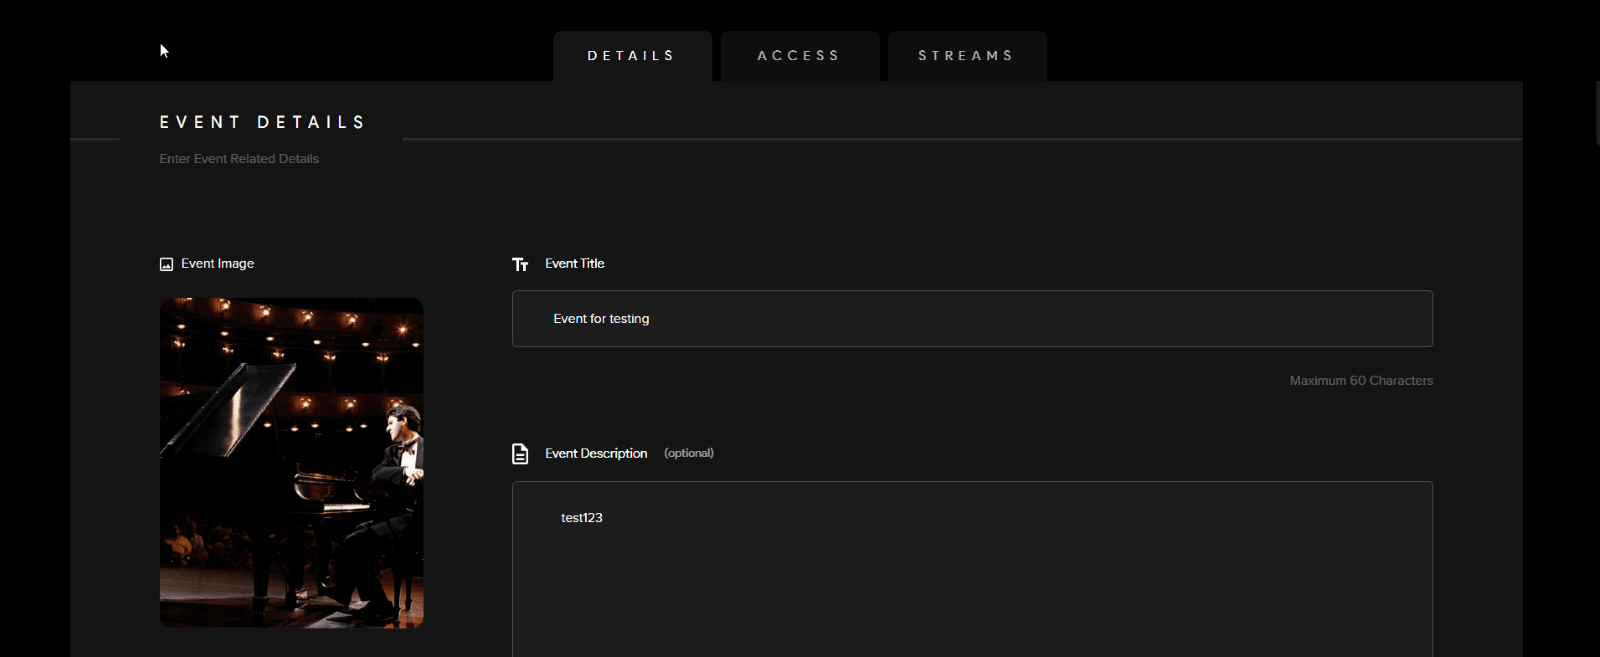
1) Select an Event Image (Note: Min. image dimensions 500 x 500 - Max file size: 20 MB)
2) Chose an Event Title (Maximum of 60 characters)
3) Event Description (Optional)
Event typeType
4)2. ThePick eventan creatorEvent can select the type of event they are hosting. There is a wide range of event types asType. Odience has the versatility to serve more than one domain.

Listing Add Ons
Note: All Listing Add Ons are optional.
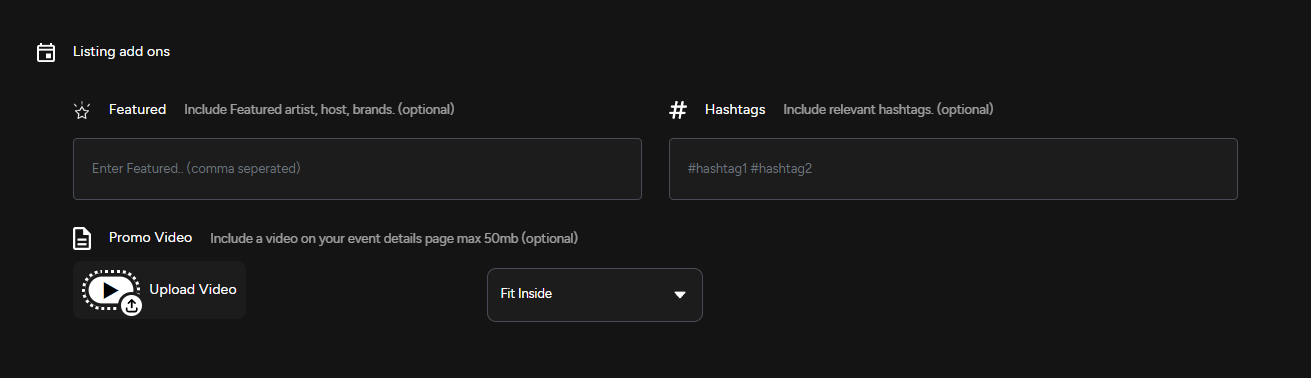
5)3. Featured
- Include featured artists,
host,hostbrand.and(optional)brands. Use
Includerelevant hashtags(optional)&
7) Promo Video:
Includeupload a promo videoon your event details pageto engage youraudience and give them a feel for what's to come. (optional)Choose a video file to use as your promo video.audience.You can trim the video length by selecting the video file you have just uploaded.You can also make visual enhancements to your video by selecting the tab beside the trim section.Click next to apply changesLastly, in the dropdown just beside your promo video, you can adjust the display options of your promo video. Click the dropdown to adjust how you would like your video to be displayed. This will depend on the export settings of your video.
Access
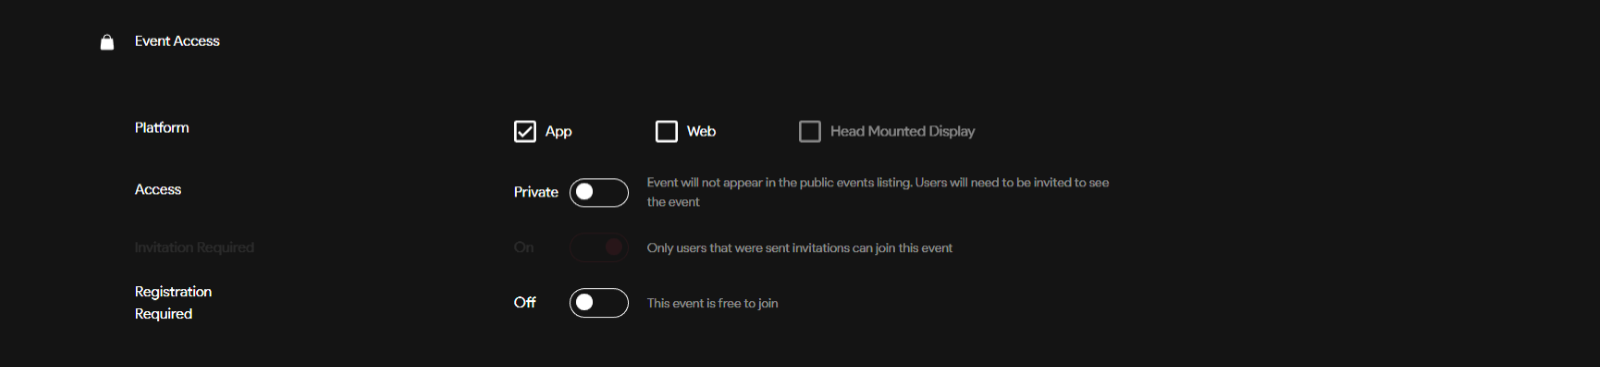
1) Platform4.
- Select
wherewhichyou would likePlatform your event will bepublished.It can bepublishedonon.thePublishing options include our mobile app, the web client, or using a head mounted display (Supported on all VR headsets, including Vision Pro).
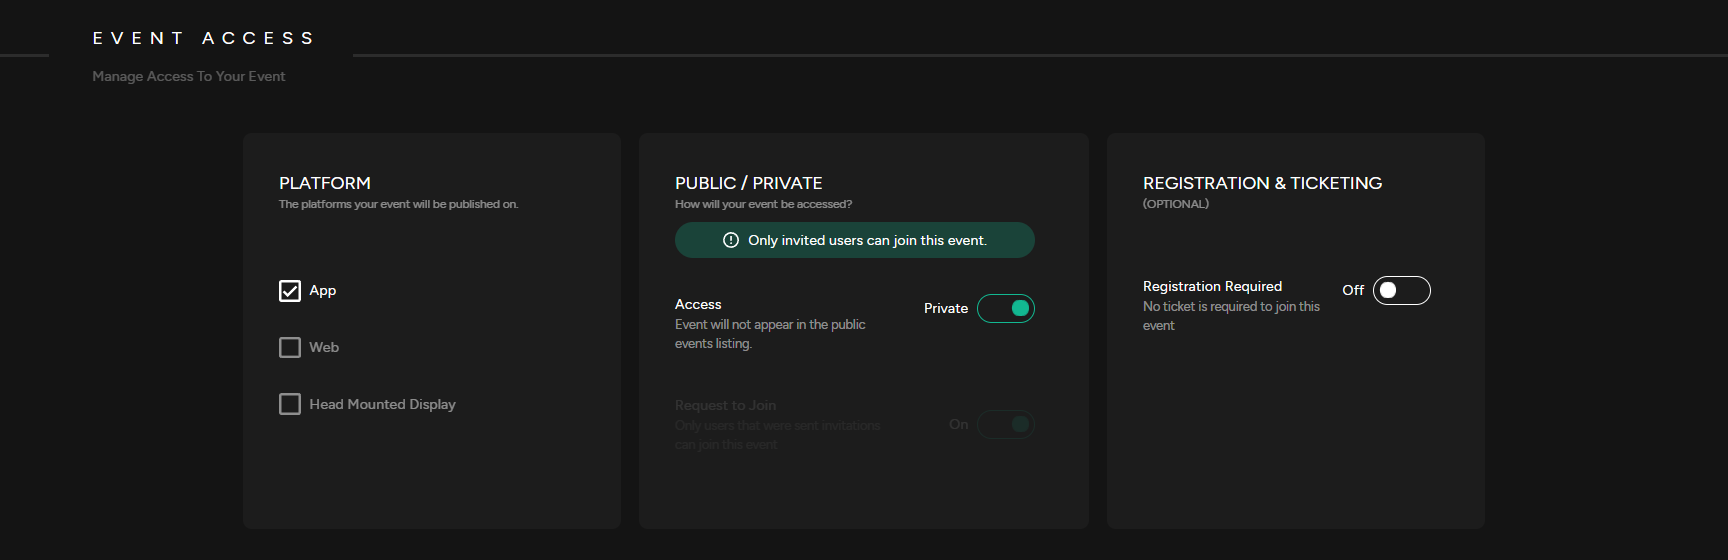
2)5. AccessPublic or Private
- Private Event: A Private
Private:TheEventevent willdoes not appear in the public events listing. Users will need to be invited toseeaccess the event. Public:Public Event: A Public Event is listed in the public directory and visible to everyone .
3) Registration & Ticketing
ARequestticketingtosystemJoin:whereIf enabled, usersmustwillacquireneedatoticket, or many tickets,request to join the event.(Optional)
4) Edit Tickets
If registration to your event is required, you will be able to Edit Tickets.

Tickets
Ticketing7.Platform:Choose if you want the tickets to be distributed directly throughOdienceor with thesupported third party ticketing platformcalled Eventbrite.Tickets: Pick where the tickets to the event will be "free” or if they will need to bepurchased.Currency: If the tickets need to be purchased, select the currency they are being sold in.Ticket Class:Differentclasses of tickets can be sold at different price points. There can also be a limited quantity assigned to a specific ticket class. For example, you can have General, premium & VIP tickets being sold at different price points and each at a set quantity limit.
5) Event Length
- Select the
durationStart/End date of yourevent.event,(Startsetdateashouldcapacitynot&beaddfurther than 30 days from now)

6) Event/Viewer Capacity
Thean eventcreator can decide on thecapacitylimit of their event.location (Optional)

7) 5G Only Option
The 5G only optionessentially restrictsthe event access and use to users with devices that are supported by 5G.

8) Event Location (Optionaloptional)
Event creators have theoptionto show where the event is being hosted.

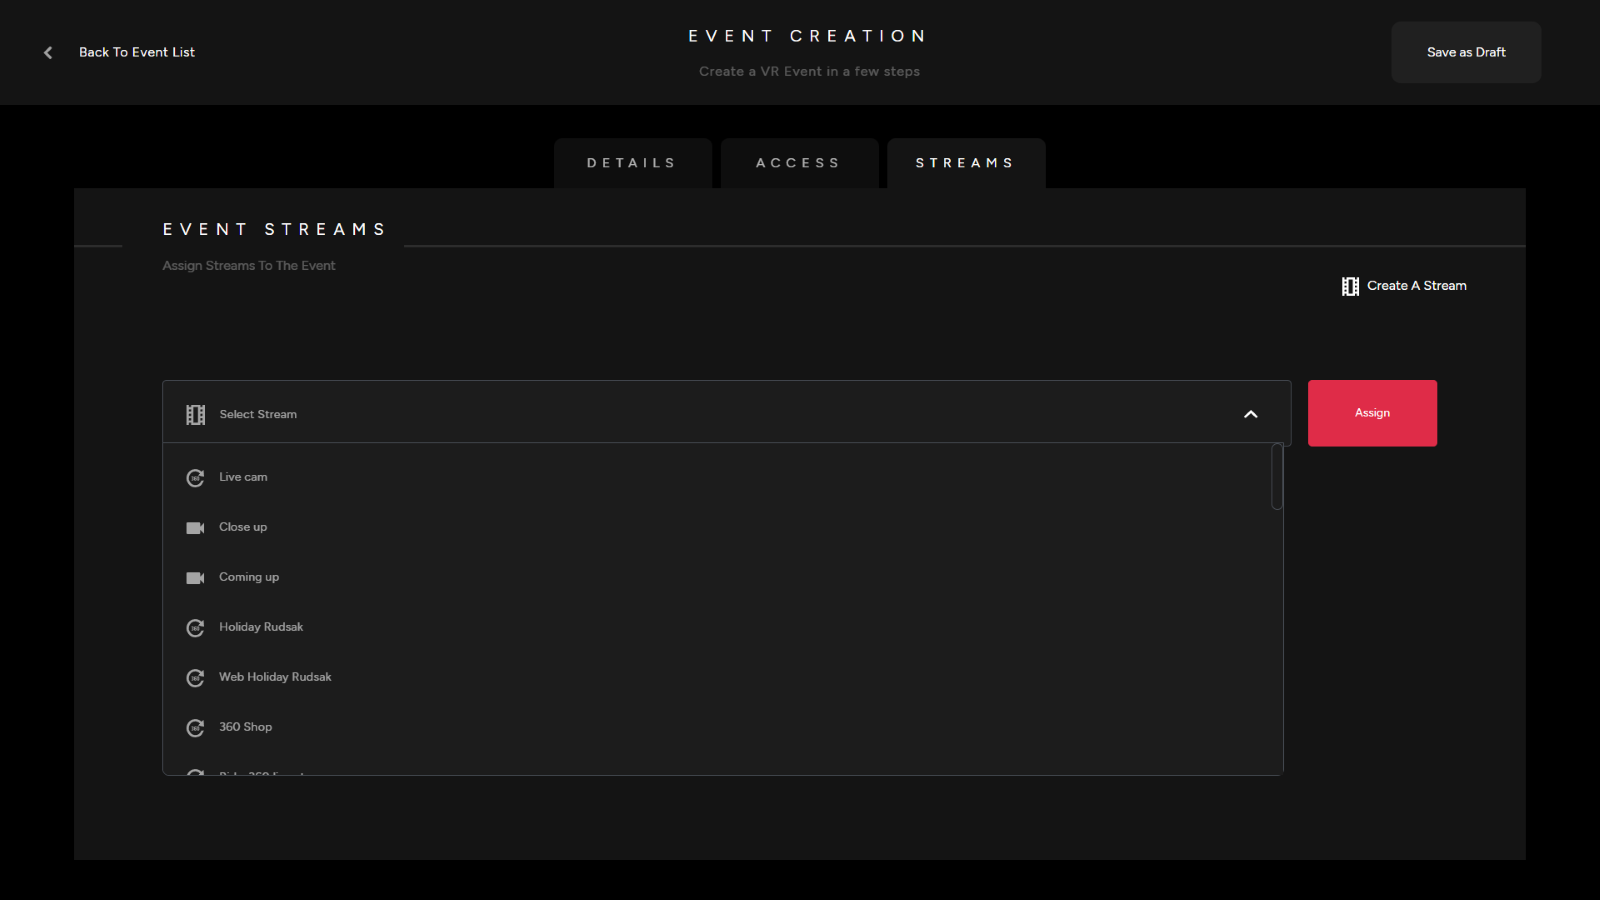
Streams
Assigning8. Pair a Camera by scanning QR code pop up or create and assign an ExistingRTMP Streamstream to your event.
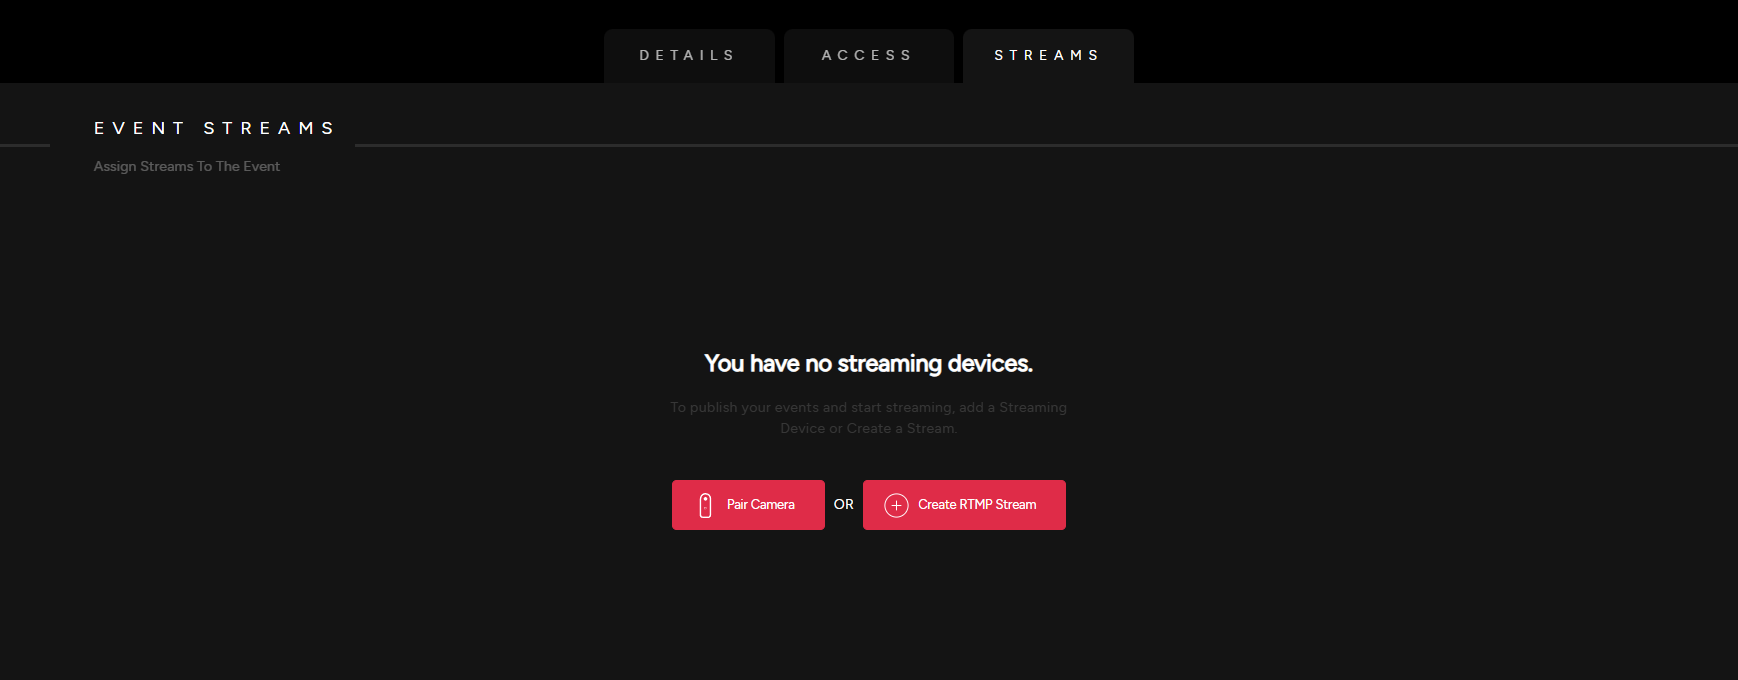
SelectSeetheourdropdetaileddownguide&onpickastreamhow toadd,CreatethenanclickRTMPassignStream.to confirm your selection.