Shopping Chatbot
Create Shopping Chatbot
Connect to a Shopify, Magento & other stores or to a Merchant Product Feed.
Note: The process of creating a Shopping Chabot, whether it be with an Ecommerce platform or with a Merchant Product Feed, is identical. Only difference is in the product links you will need to source productslink to your chatbot.chat. See below for more details...
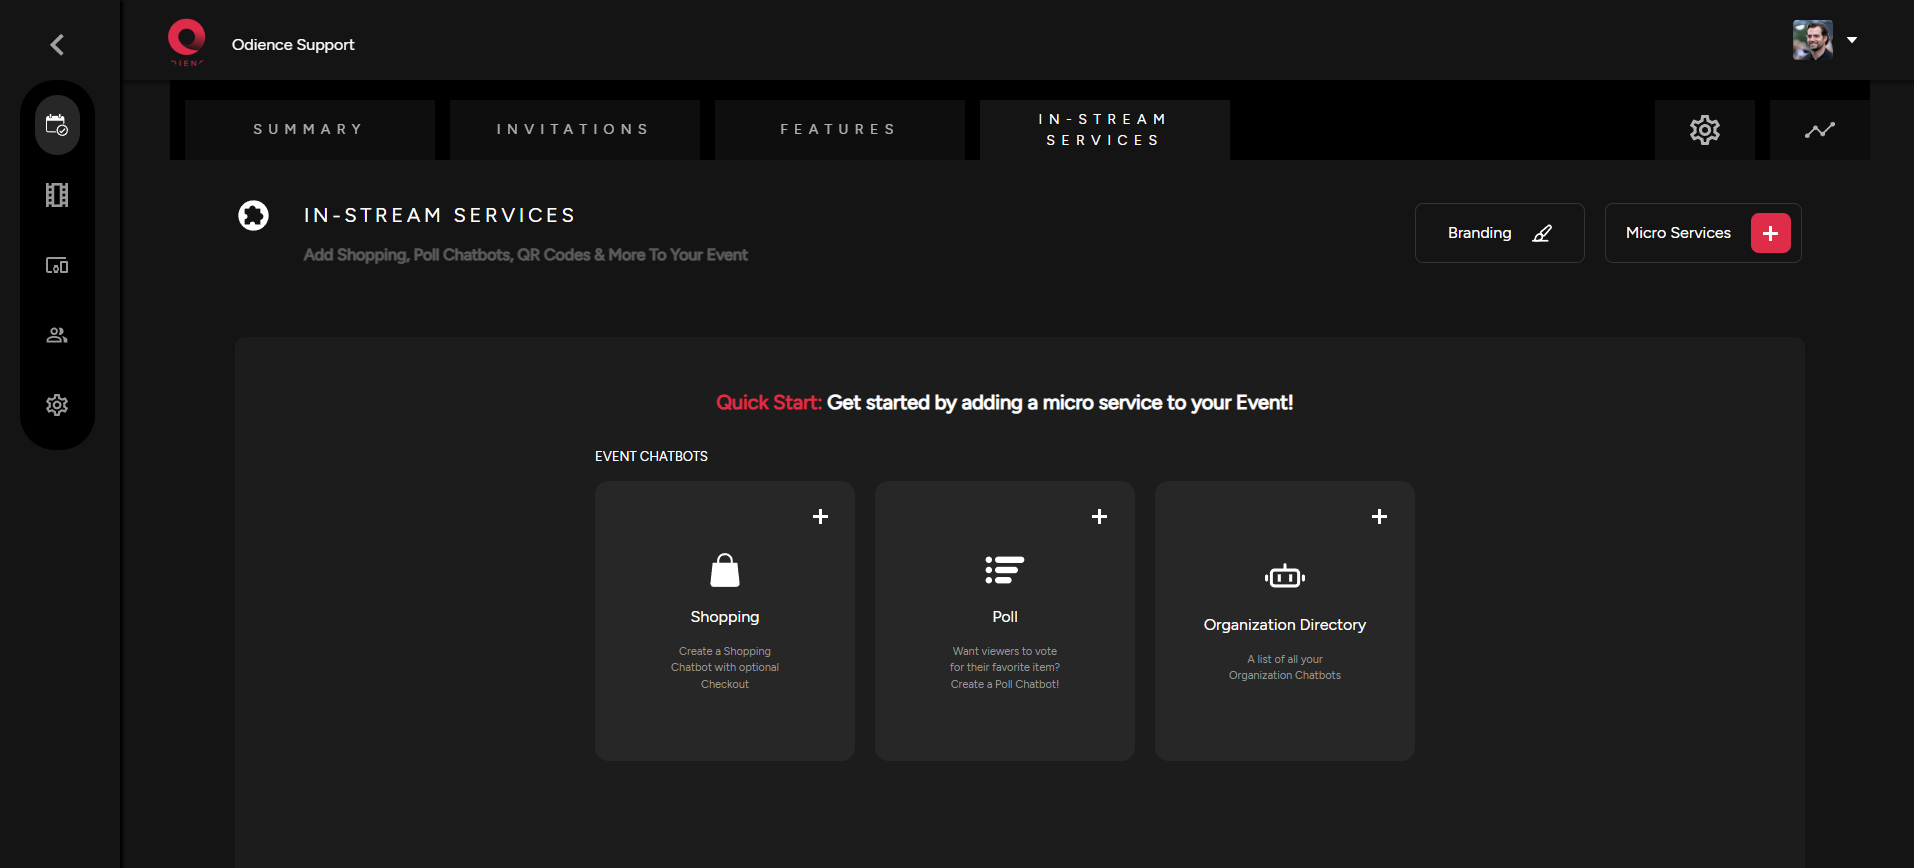
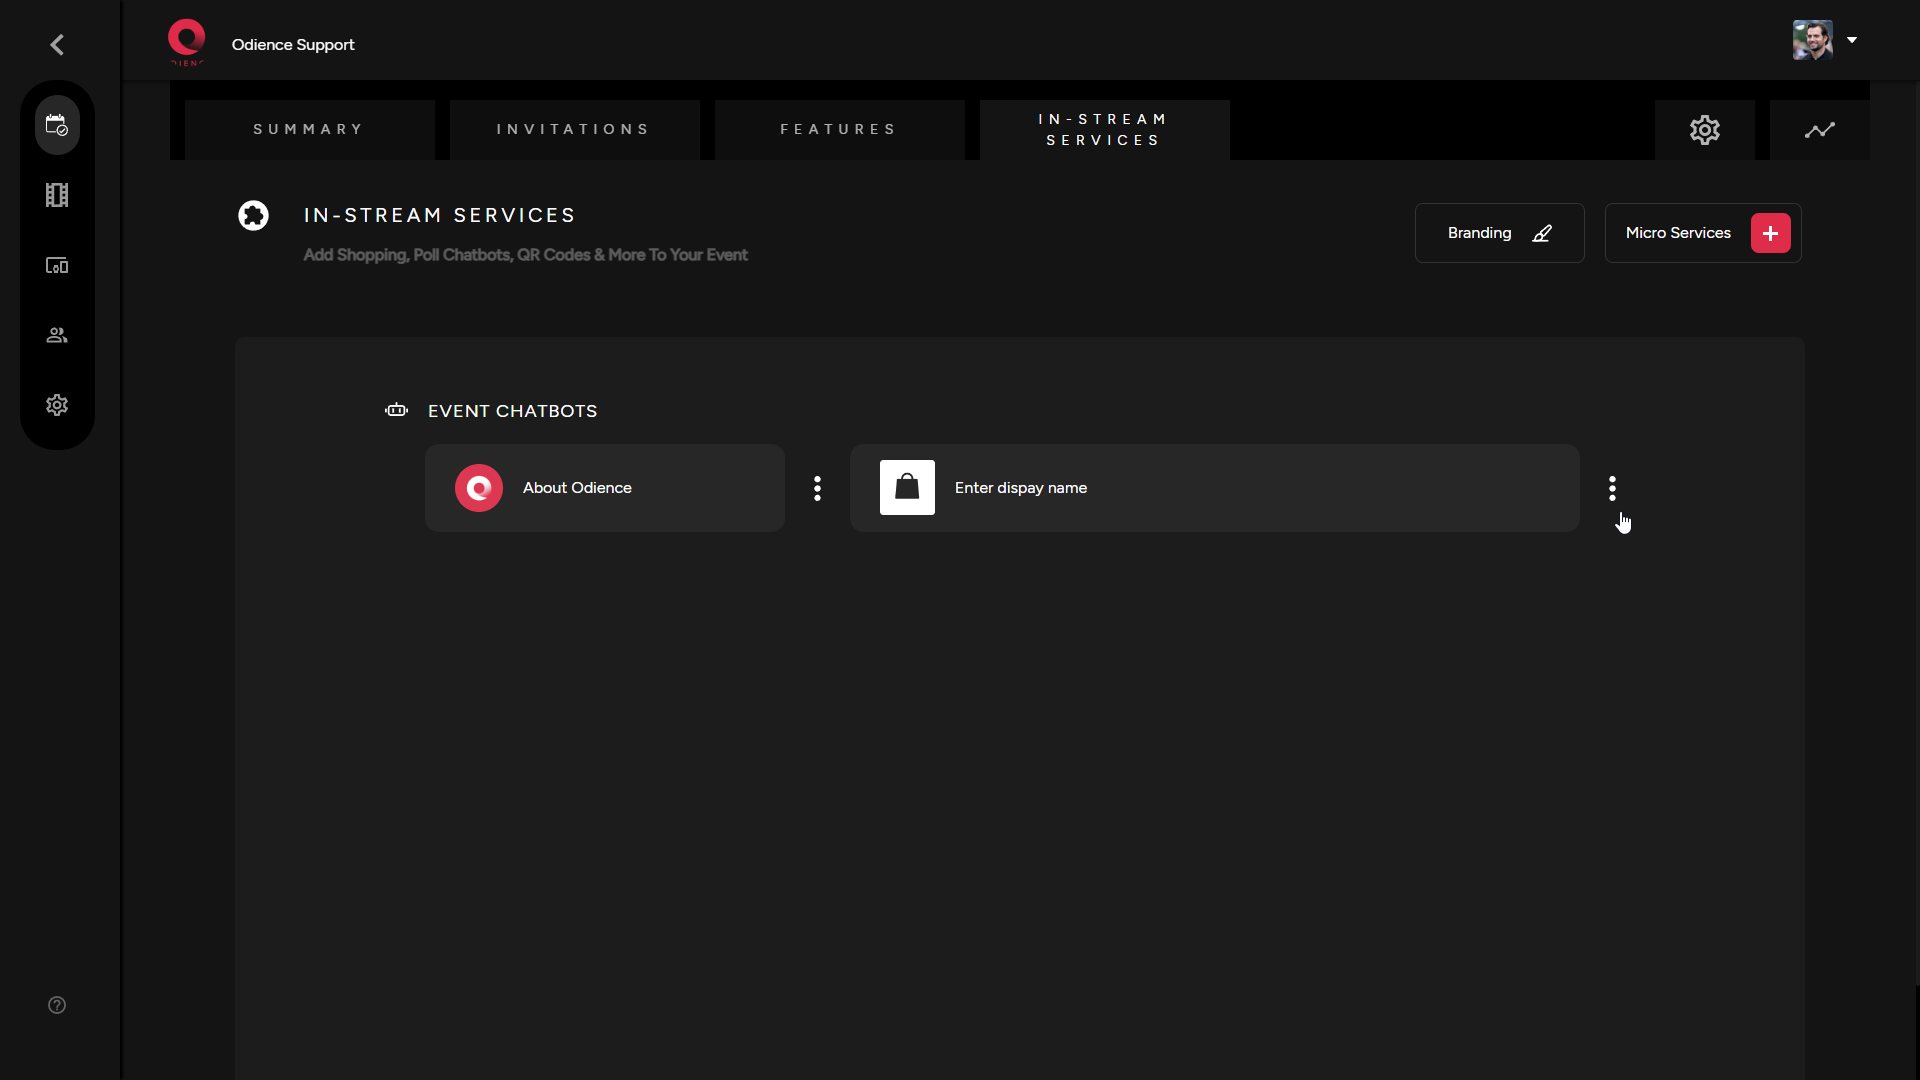
1. Start by selectingSelect Shopping in your Quick Start or by selecting Add Chatbot in your Micro Services dropdown.
2. Select “Ecommerce platform”. Odience supports Shopify, Magento & other stores.
Note: Odience supports ecommerceEcommerce platformsPlatforms such as Shopify, Magento and others. WeOdience also the support the use of Google, Amazon & other XML merchant feeds.
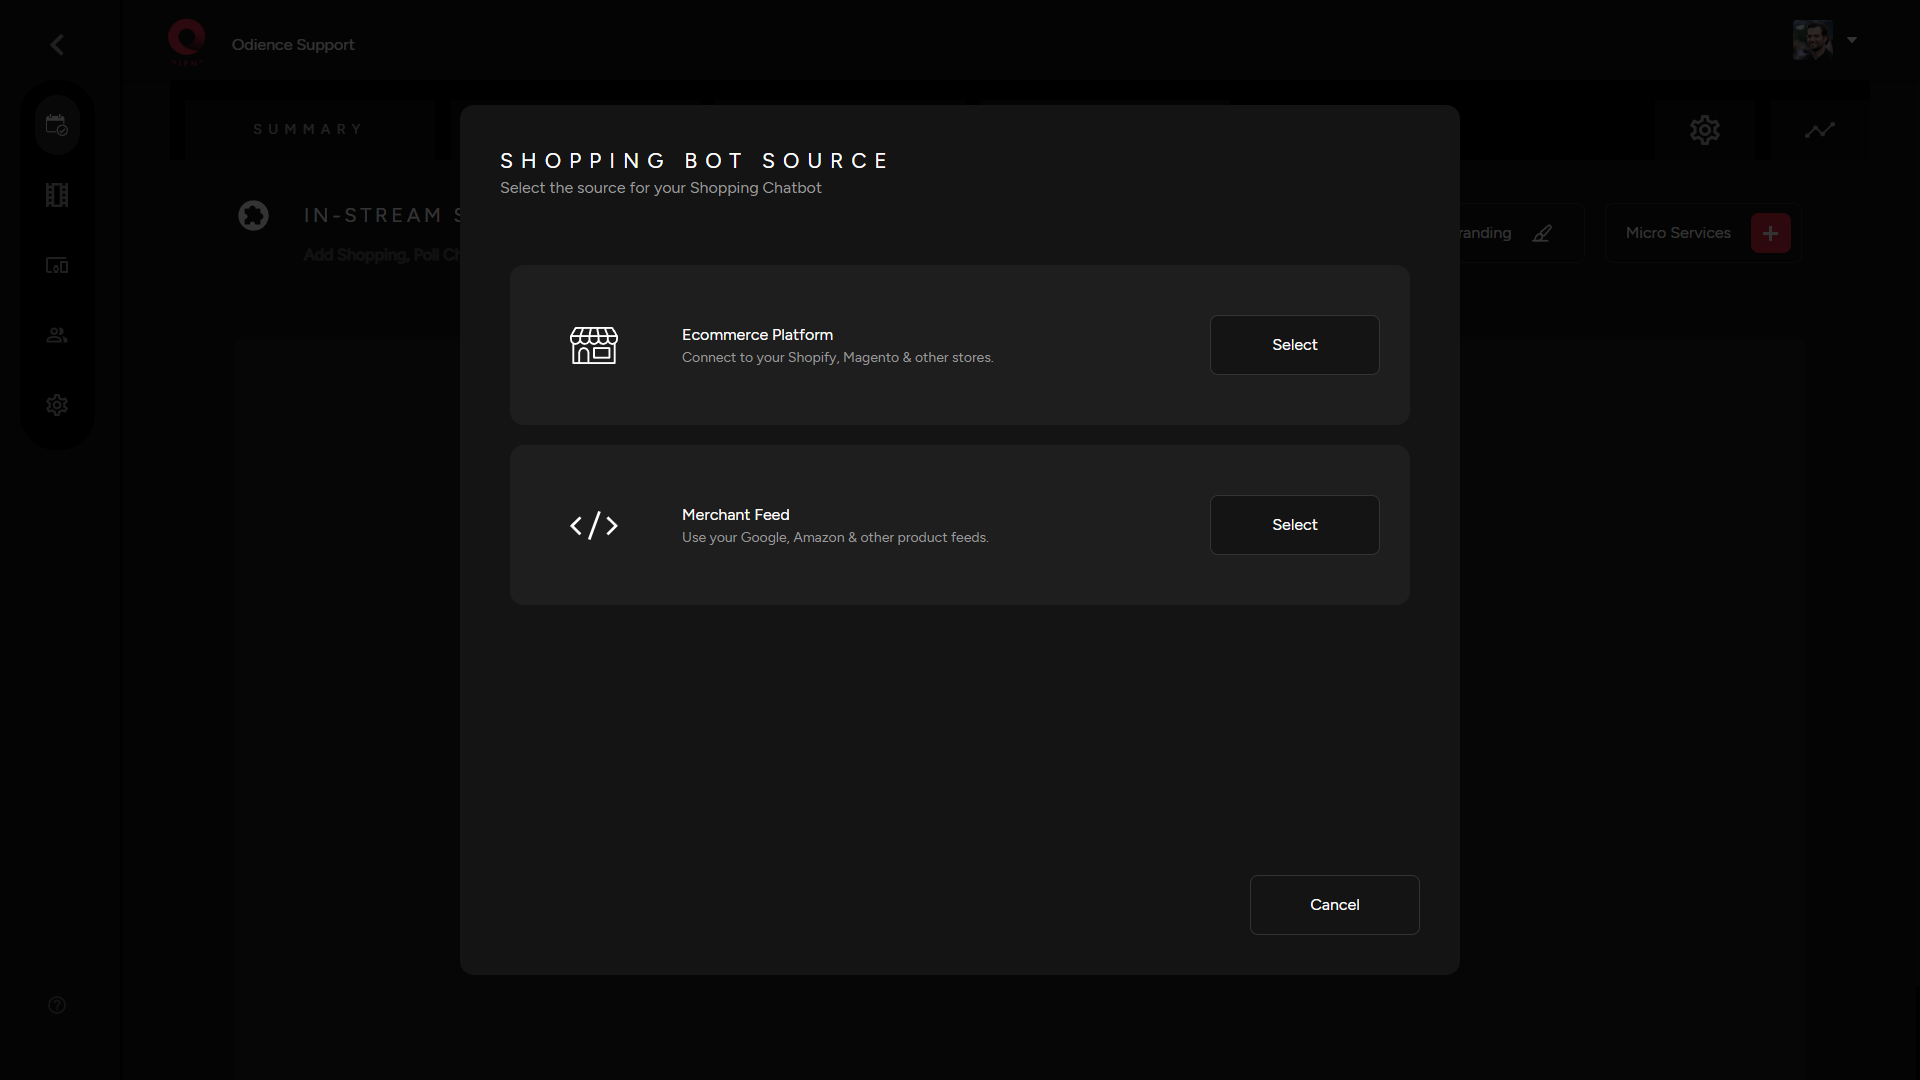
3. Select the platform you will be transferring your items from.
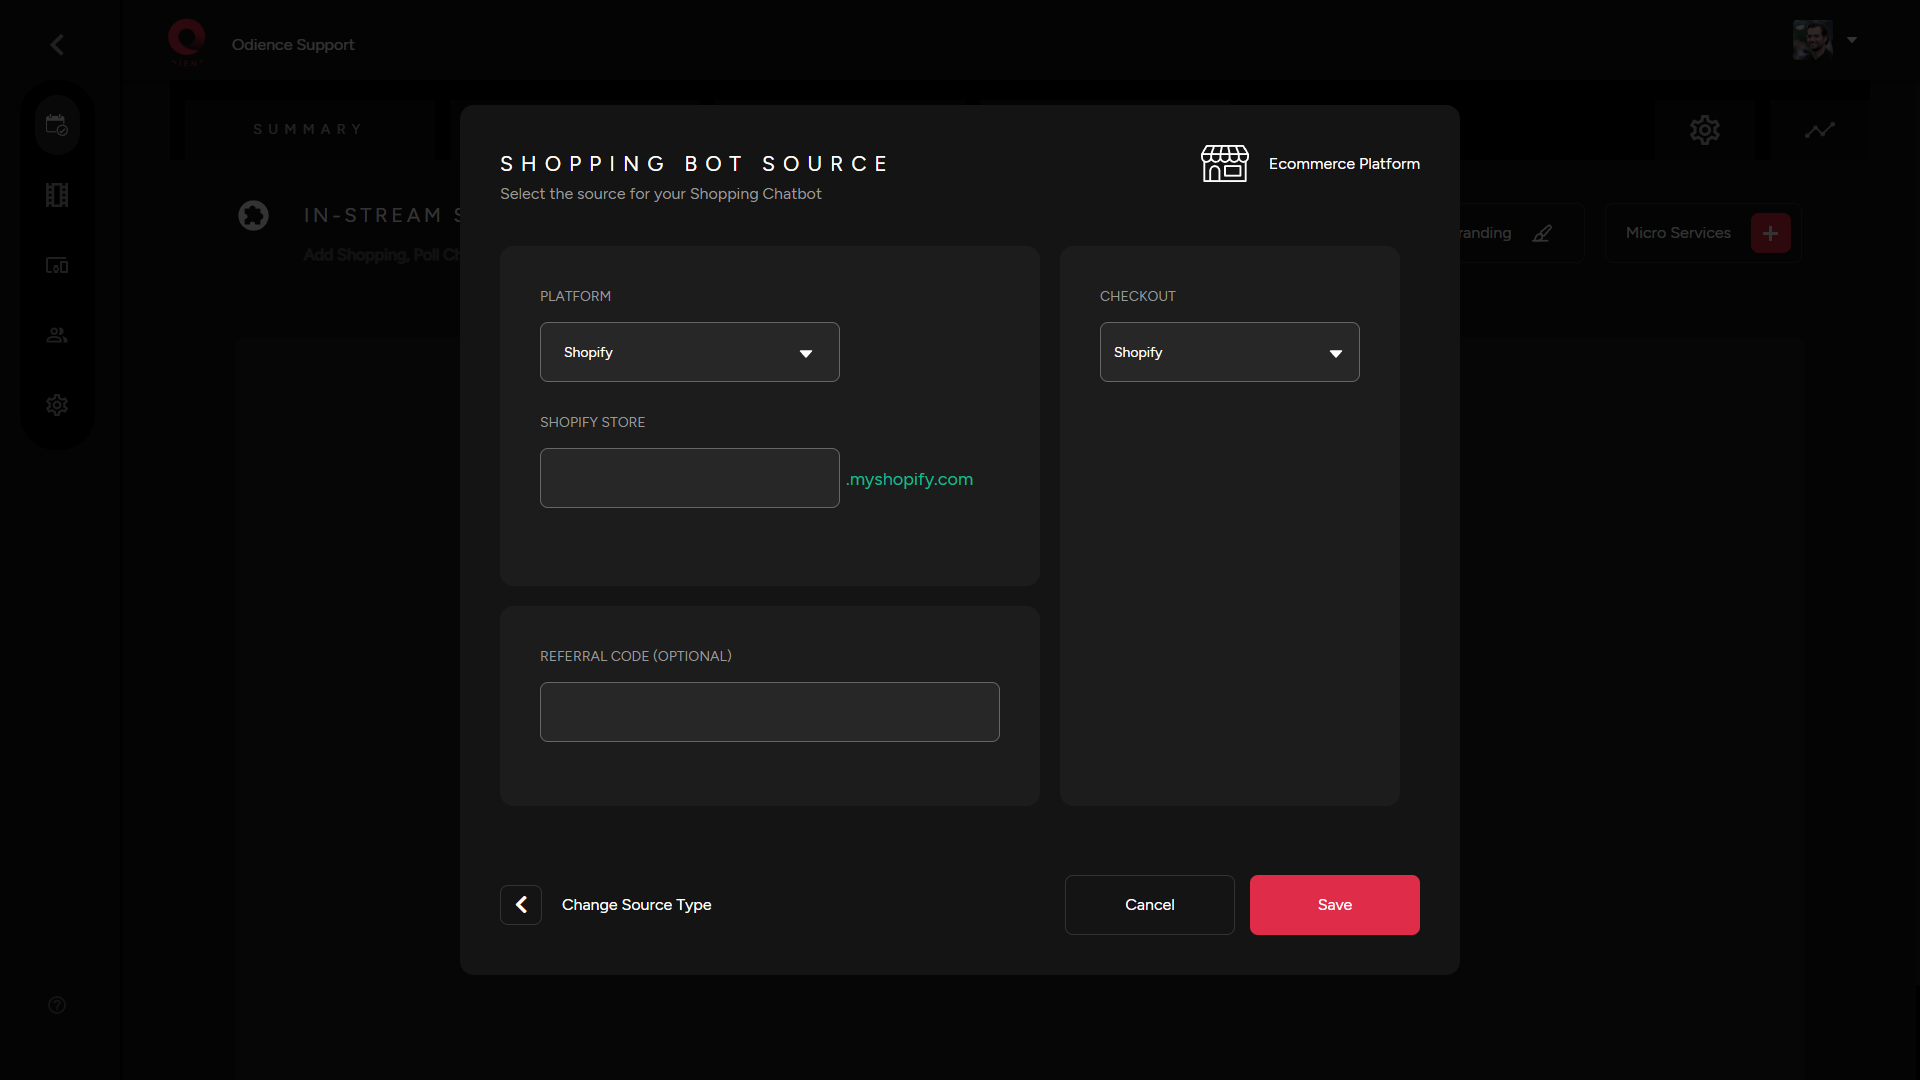
4. Link your storeStore to connect products to your chatbot. Referral Codes can also be created but it is optional.
Note:4.1. If Merchant Feed was selected overthe ecommerce option, the only difference is thatEcommerce, you will need toenterprovideaan XML product feed URL (see screenshot below for reference). All steps before and after stay the same regardless of the shopping source.
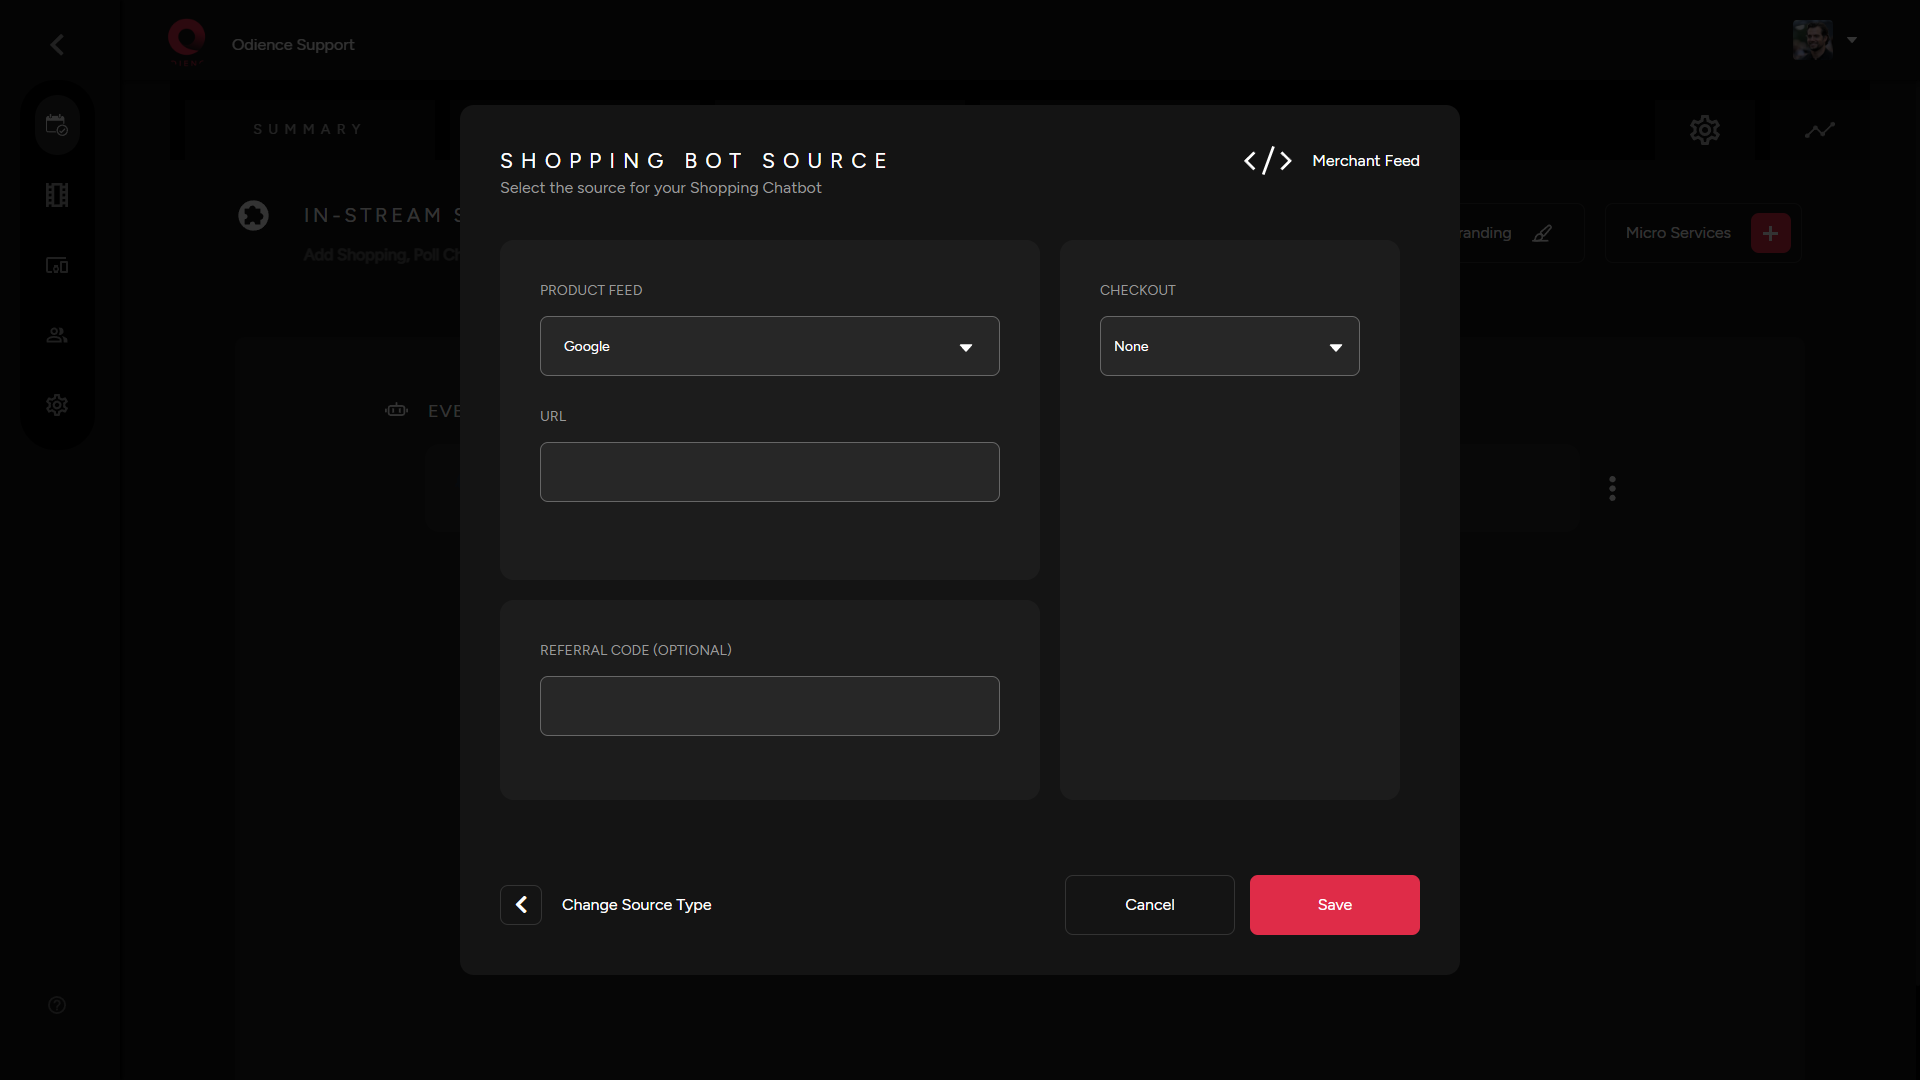
- Note: Odience supports the use of Google, Amazon & other XML merchant feeds.
6.5. Select checkout platform & then Click Save.
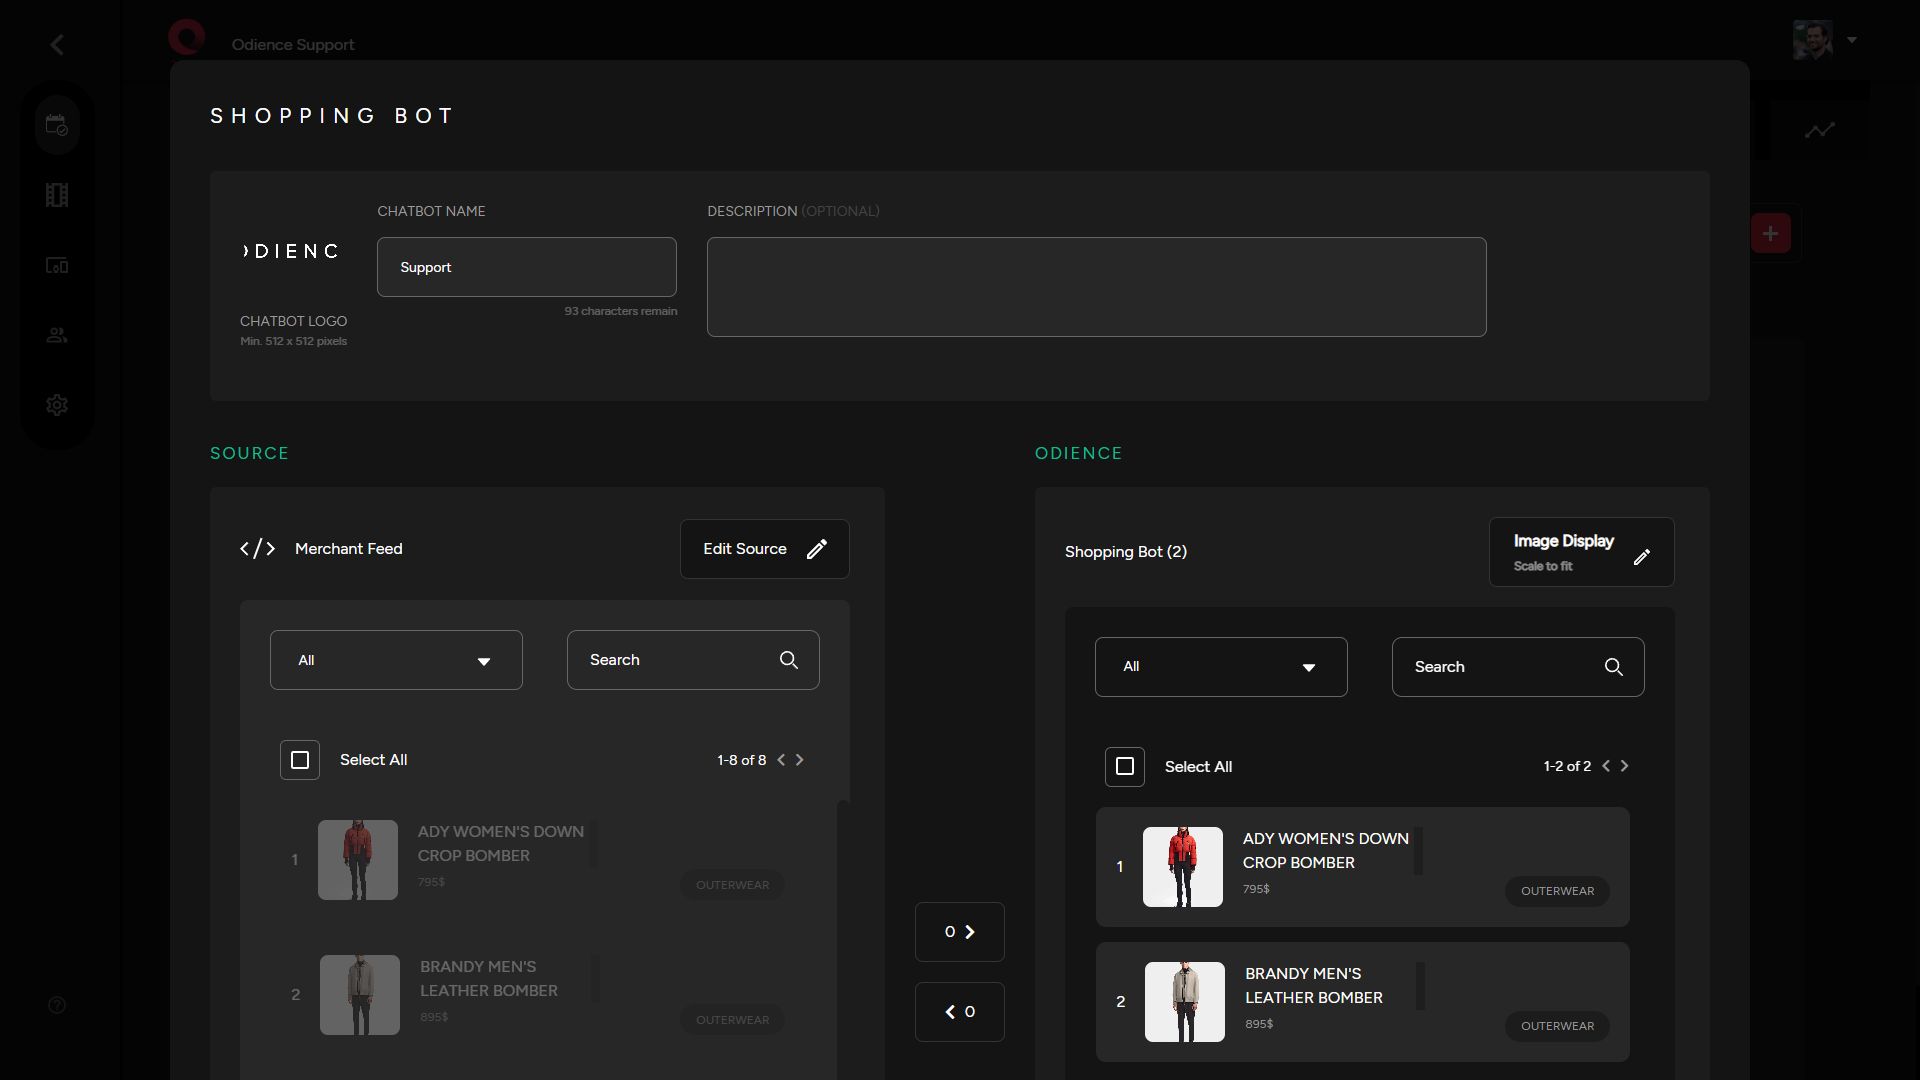
7.6. Add a Chatbot Logo, Name, Description (optional) & then select which products from your storesource you want to include in your Odience shopping chatbot.
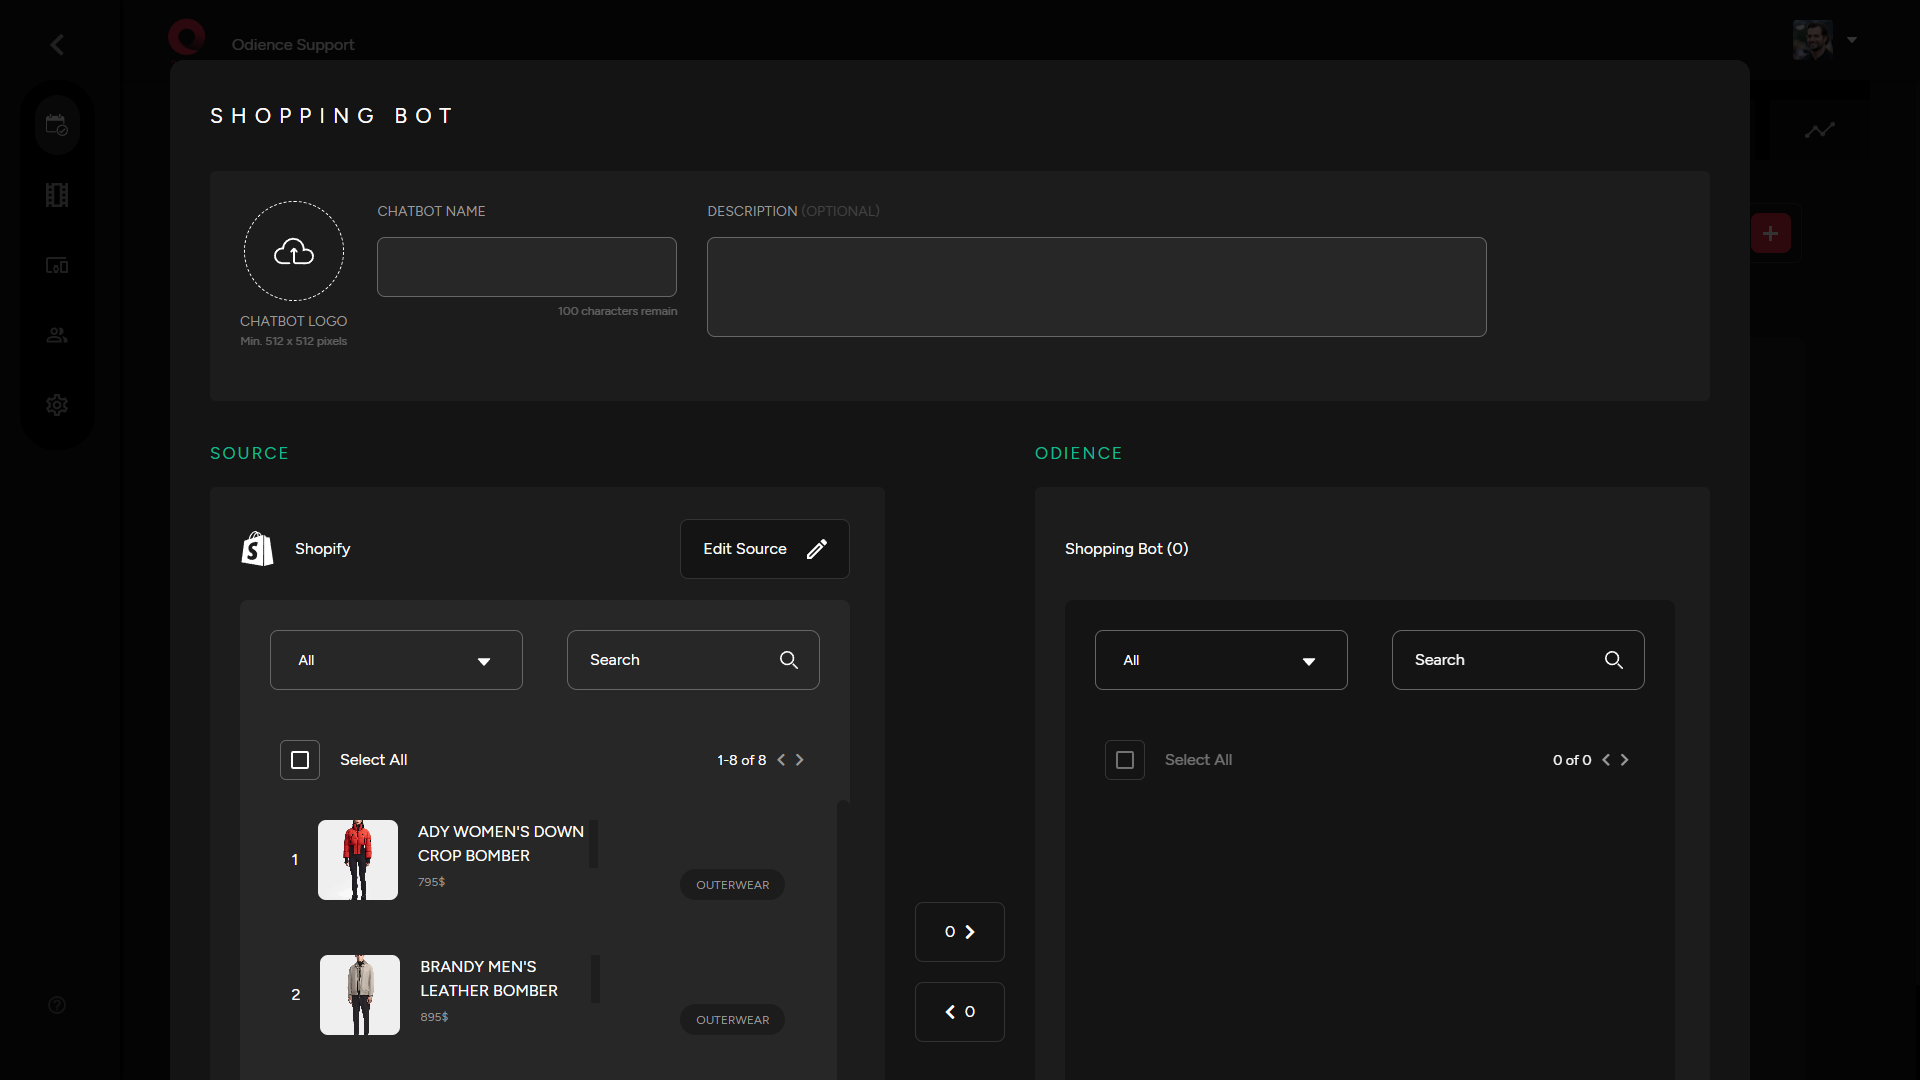
8. Click save to add Chabot to your event. The information can be edited.
Edit Chatbot
-1. Select the stacked bullets for more options and click Edit.
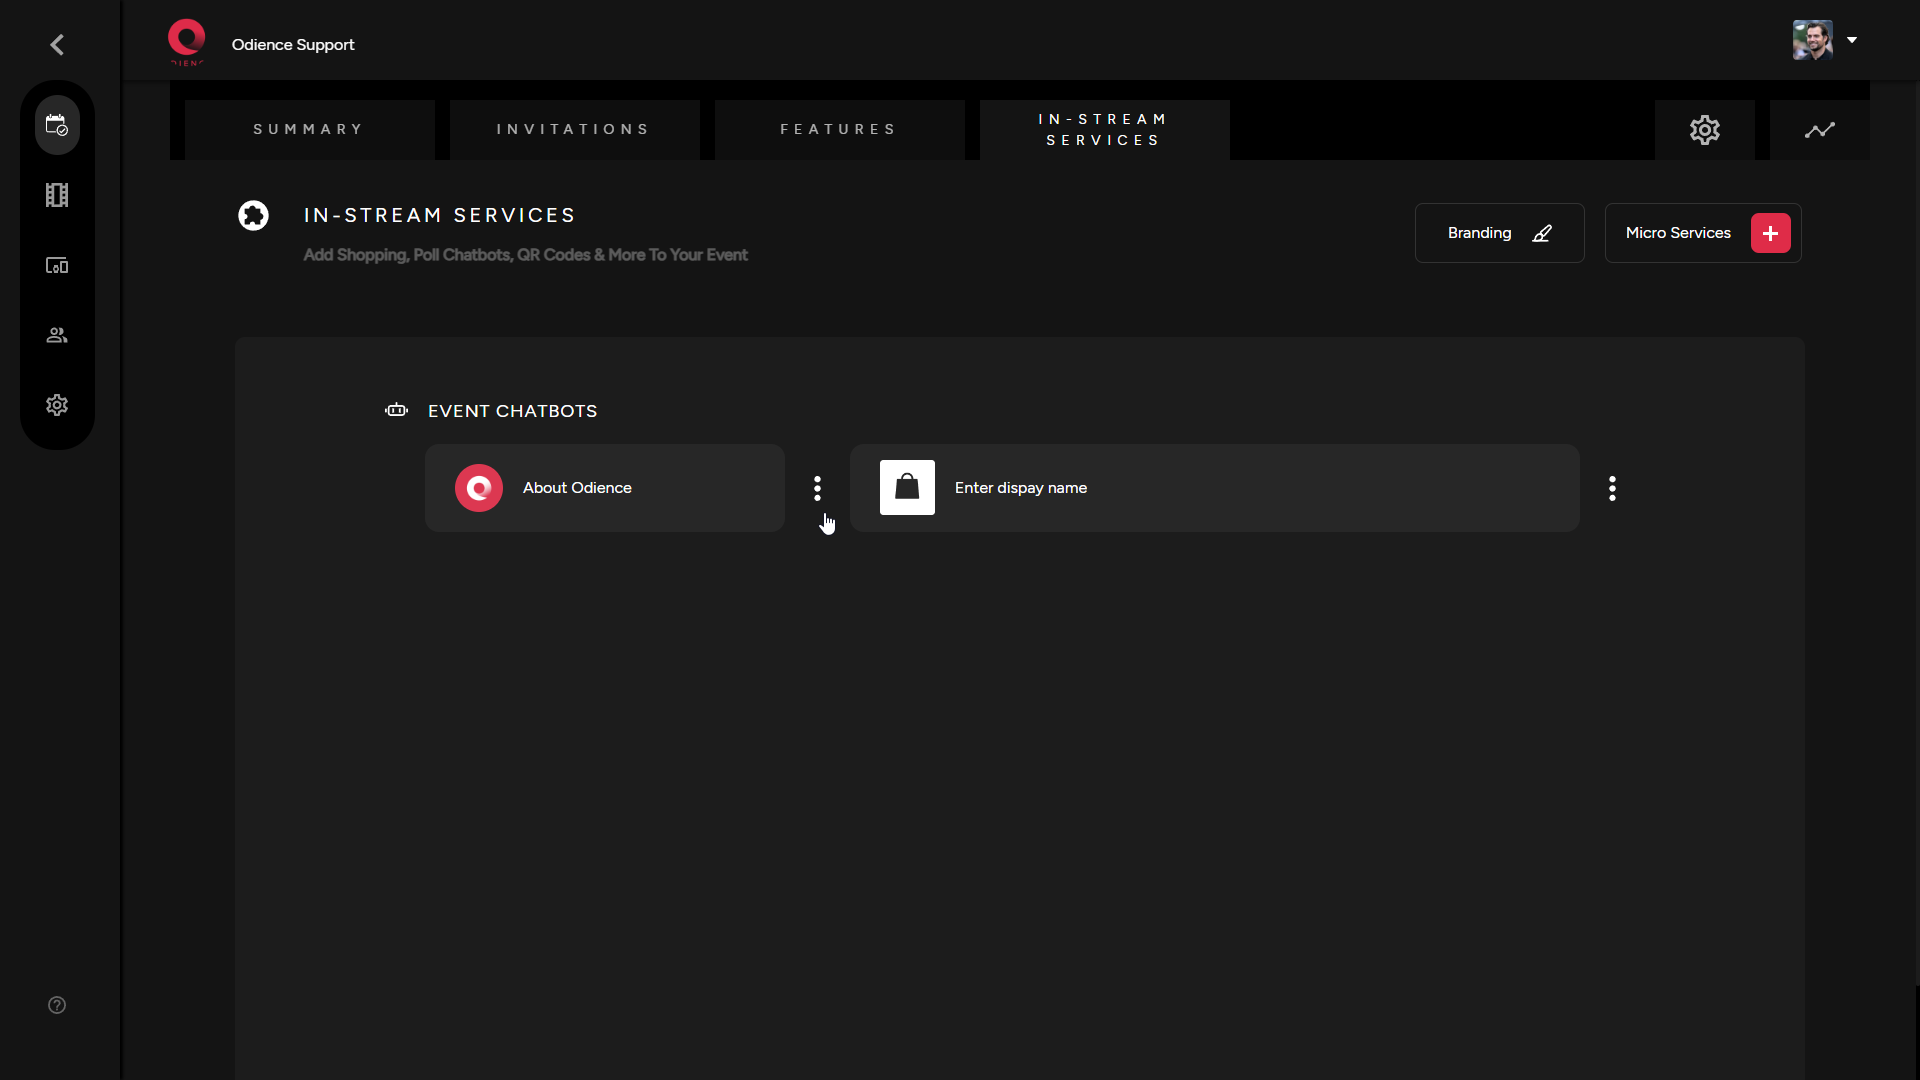
2. Edit your Chatbot Logo, Name, Description &and Products byused selectingin theyour threechatbot. stackedClick bulletsSave to theconfirm leftchanges. for more options.
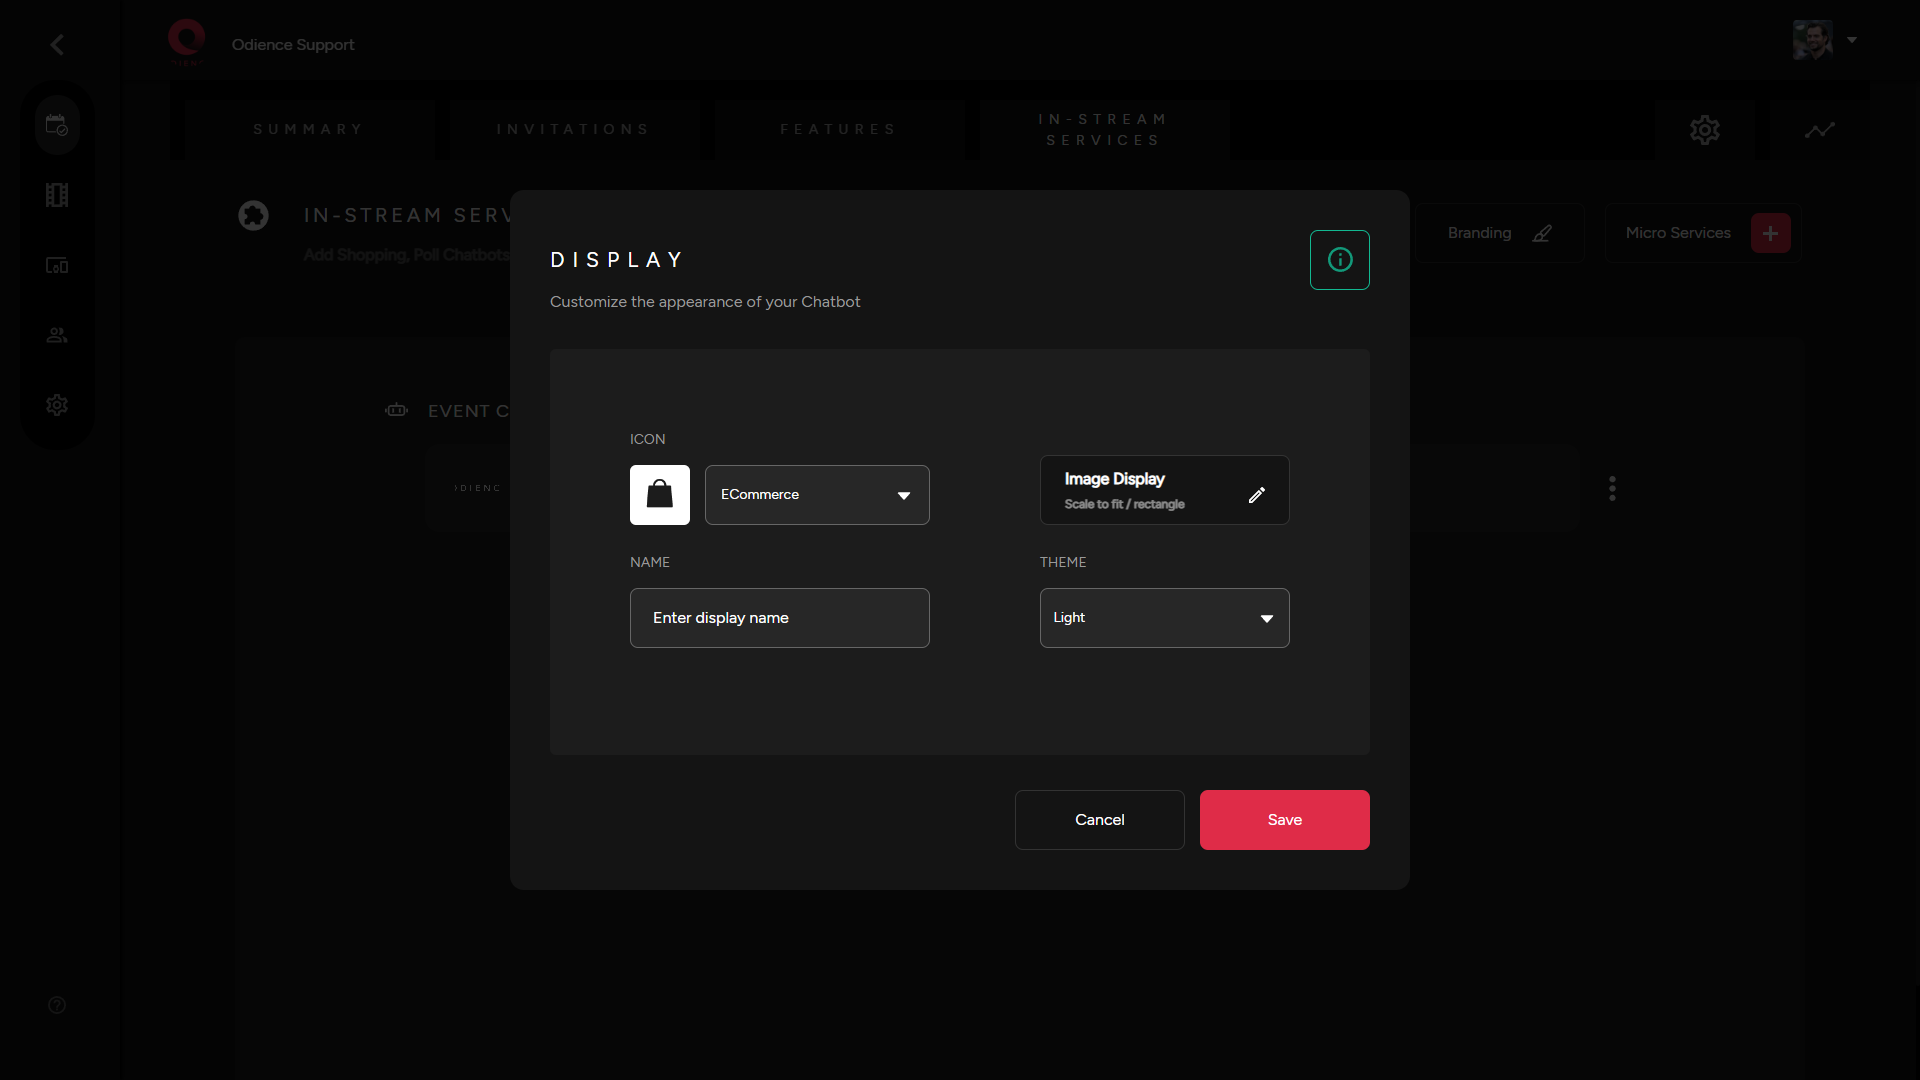
Customize Appearance
-1. Select the three stacked bullets towardon the right side toof customizeyour chatbot.
2. Customize the appearance of your chatbot. Click Save to confirm changes.